Making a Prusa XL Miniatures Profile and Test Printing a Model
Greetings, Dear Reader! Welcome to Fighting Filament, my blog around miniature printing and hobbying. Today, we're going in-depth on my journey to test and share a miniatures-optimized profile for my Prusa XL. I'll then showcase a miniature print using that profile with a quick paintjob. There's even a bonus story at the end for those who like long-winded troubleshooting stories. I hope you enjoy!
In case you just wanted the XL print profile, here's the PrusaSlicer config bundle:
I have owned a Prusa XL for about a year and a half now. I originally used it for multicolor printing, but have since been using it for more utilitarian things like storage organizers, terrain, and bases with 0.4mm nozzles. I've always wanted to make awesome miniature prints on it, but during that time I've burnt out trying due to a few reasons. Today is my re-entry into the realm of FDM miniature printing on my XL.
I'll also preface by saying, if any of this interests you, feel free to subscribe (totally free) to get newsletter updates from the blog!
An Honest Look at Print Quality
Before, when I was printing the occasional mini on my XL, I had mixed results. At first, I tried printing with the (at the time) brand new fancy input shaping profiles. These turned out to be totally unsuitable for the detail required for a tabletop mini.
I then thought I needed to craft my own profile to get the best results. I started watching and copying YouTube video suggestions into a custom profile, consuming just about everything that was considered relevant at the time. Many of these turned out to be wrong (for me at least) - one claimed that 0.07 millimeter layers were the lowest value I would ever need and resulted in better-looking prints and overhangs (not true.) Another insisted that I should print PLA at the lowest temperature possible, 190-200 °C (hello failures and inconsistent extrusion.) I also selected the totally wrong models to attempt to print at that time - they were far too spindly and delicate to ever work.
Eventually, I discovered that the default Prusa Ultra High Quality preset (non-input shaping) and stock PLA filament profiles gave me far better results with a lot more stability. That's what I've used on any successful miniature I've printed from then until today. That has been fairly good, but now I want to see what the printer can truly do.

Some of my old print projects.
This time, I'm going to do things right. I want to understand what works for miniature printing and what I can push the printer to do at its peak. My new goal is to create (copy? steal? what's the difference) a great printer profile that I can reuse and share with the community for miniature printing.
Learning From the Community
r/FDMminiatures is a subreddit focused on getting great detail miniature prints out of FDM machines. It's filled with a lot of great experimentation and shared results, and most importantly, constantly tuned profiles. It has two main experts (u/HoHansen and u/ObscuraNox) whose contributions have made the entire forum what it is today. They experiment with tuning optimized profiles and share their results regularly. They're also quite active in providing support. It's the only place I've found with this level of quality information regarding FDM miniatures.
I want to give special credit to u/ObscuraNox, whose v1.3 Balanced Miniature profile became the starting point for my 0.05mm ULTRADETAIL @XLIS 0.25 - Balanced Miniatures profile. It was made for a different printer, but the ideas behind it apply all the same.
Requirements
Before I got started, here's my requirements I've laid out for myself:
- This must be usable on stock PrusaSlicer (so no OrcaSlicer files.)
- It should be based off a Prusa stock setting, so that I modify as little as possible to get the detail but maintain the reliability from Prusa's own tunings.
- This must use input shaping, so you don't need to click an extra button every time you start your print up using it on the Prusa XL (new warning I guess.)
Creating the new profile
I started with Prusa's 0.05mm DETAIL @XLIS 0.25 preset as a baseline. I chose this because it enables input shaping and it's the highest stock level of detail. I know I said earlier that the provided input shaping profiles are bad for minis, but I believe I can tune this to have very high detail while still enabling the feature. As I expected, when I dug into the numbers, it's not nearly as slow or aggressive on detail as I'd like. The biggest issues are speed and acceleration - Miniatures like really slow speeds on the outer perimeters.
I then meticulously compared and applied each setting from ObscuraNox v1.3 Balanced Miniature into my new profile. Here's a list of what changed:
Layer Height
- Default: 0.05mm
- My Profile: Kept 0.05mm. I will try reducing this to 0.04 in the future, but I think 0.05 is a good balance of very high detail and lower print times.
Perimeter Speeds
- Default: External perimeter around 40 mm per second, with other perimeters at 65.
- My Profile: External perimeters at 18 mm per second. Internal at 24 mm per second.
Slowing external perimeters improves edge sharpness and reduces ringing. Keeping internal perimeters a little faster avoids long print times.
Infill Speeds
- Default: 100 mm per second
- My Profile: 28 mm per second
Miniature prints should not have high infill speed. Slower infill reduces vibration which leads to smoother outside walls and lower risk of micro collisions.
Accelerations
- Default: Perimeter acceleration around 1000, travel acceleration around 6000
- My Profile: Perimeter acceleration 220 to 250, travel acceleration 2500
High accelerations can create ringing and tiny overshoots on a 0.25 nozzle. Gentle accelerations make the motion more predictable and help the toolhead stay stable when printing tiny features.
Filament Flow Rate
- Default: 15 cubic millimeters per second
- My Profile: 3 cubic millimeters per second
If flow is a bit too high, over-extrusion occurs, resulting in each line to be wider than intended and small features blurring. This can also cause bulging lines throughout the print, which are a very noticeable surface imperfection. Lowering flow brings the line width closer to what the slicer expects for this profile. Small features print crisper and closer to the model. You don't want flow too low, which can cause under extrusion, but for the .25mm nozzle and these slow speed settings, 3 mm3/s is completely fine from what I've seen.
Support Style
- Default: Snug supports
- My Profile: Organic supports at a 45 degree overhang threshold, on build plate only.
Organic supports cradle the model better and remove cleanly. Organic supports on the build plate work great because they can branch out quite far from the model, not requiring the model placing supports on itself.
Support Contact Distance
- Default: 0.20 mm
- My Profile: 0.16 mm
A slightly lower gap gives supports a better chance of holding thin parts without welding to them.
Brim Width
- Default: 0 or very small
- My Profile: 6 mm brim
Miniatures have tiny footprints, so extra adhesion helps prevent lifting during long prints. As you know, I don't like it when my prints detach from the plate!
Other Quality Settings
I enabled "Extra Perimeters if Needed", "Extra Perimeters on Overhangs", and "Avoid Crossing Curled Overhangs" as additional slicer quality settings. I will report back if any of them cause any major differences in print output, but they all seem like reasonable settings.
Now that we have a profile, let's test it on a miniature!
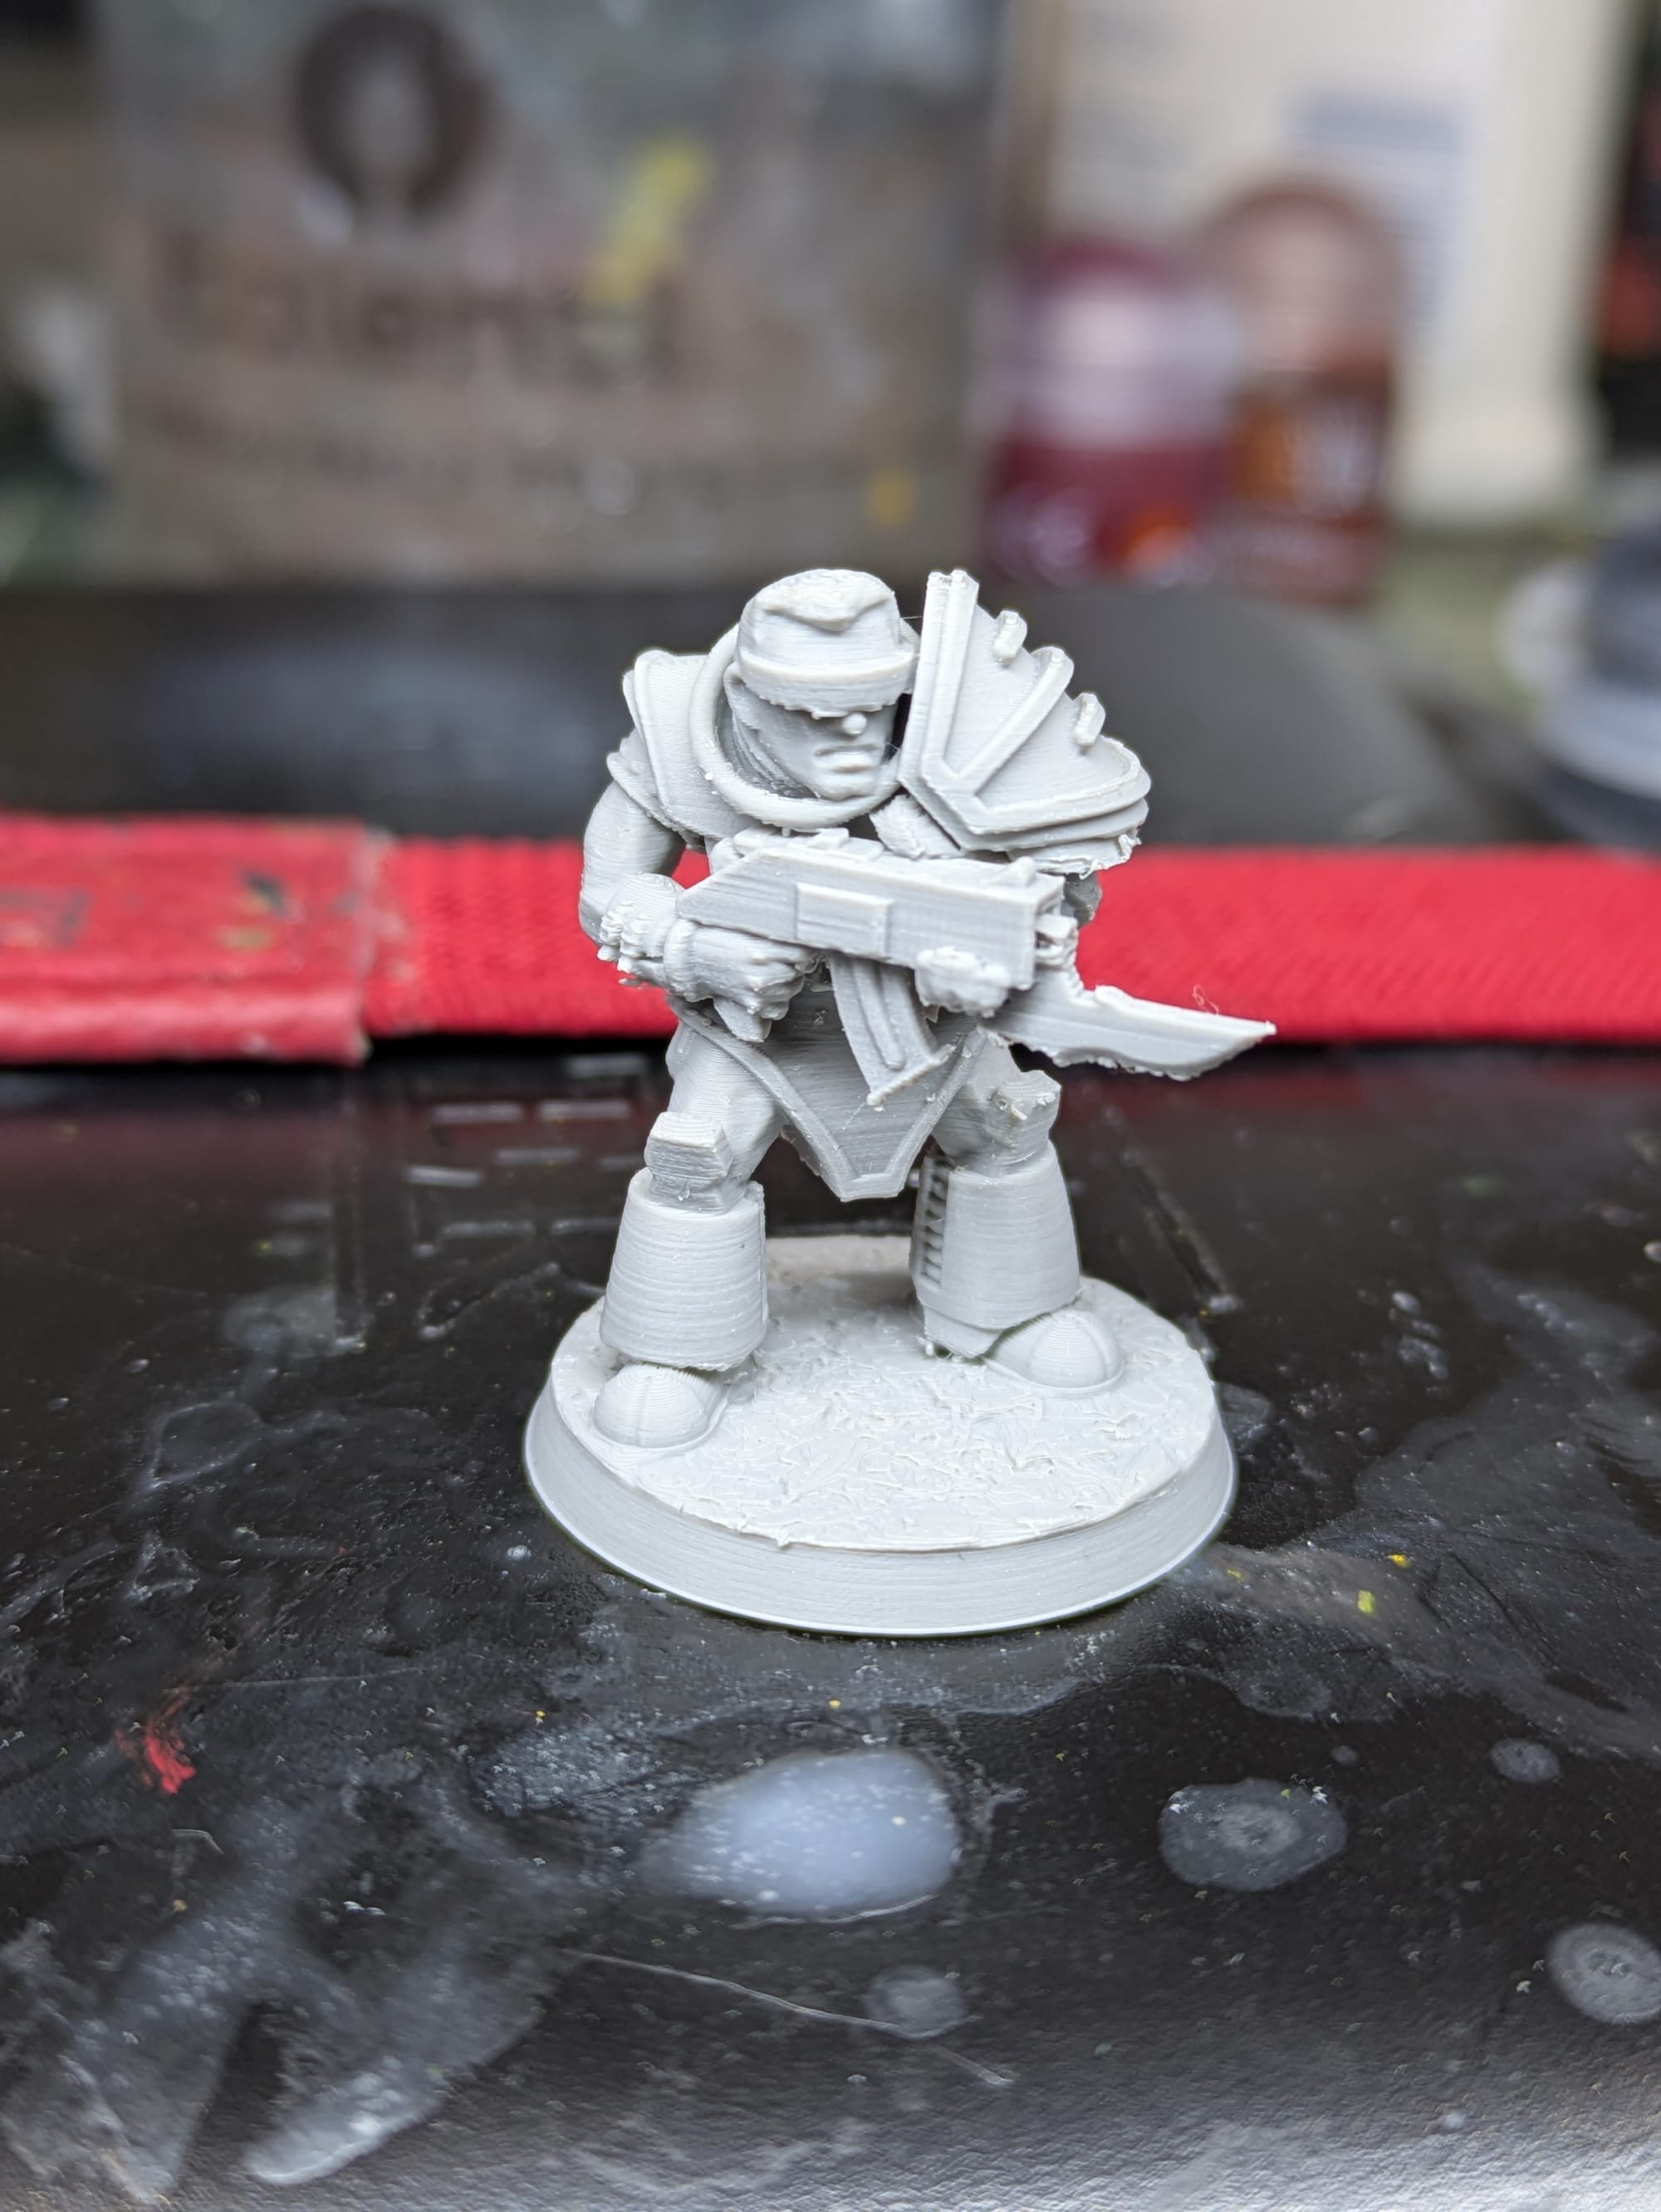
The Miniature
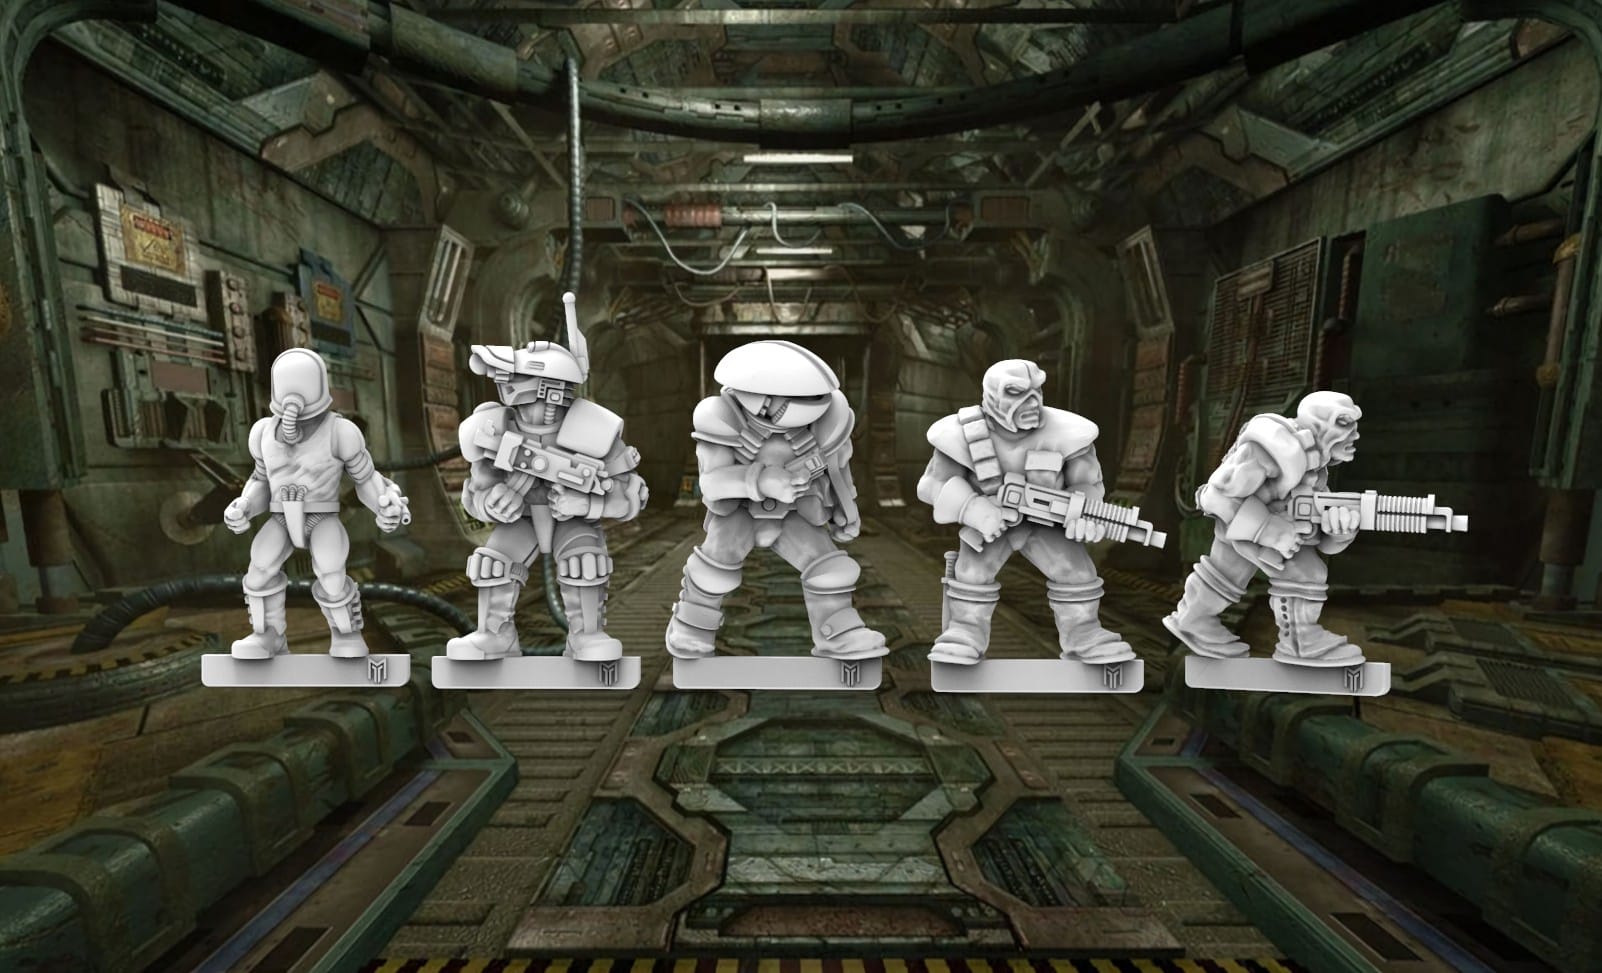
The model I picked is from BigMrTong's From the Pages series of miniatures. It's a very cool ongoing project where he's sculpting every single illustrated character from the Rogue Trader rulebook in miniature form. You can expect to see a lot of these featured on Fighting Filament in the coming months. I heartily recommend subscribing to his Patreon if that interests you and you want access to the full range.
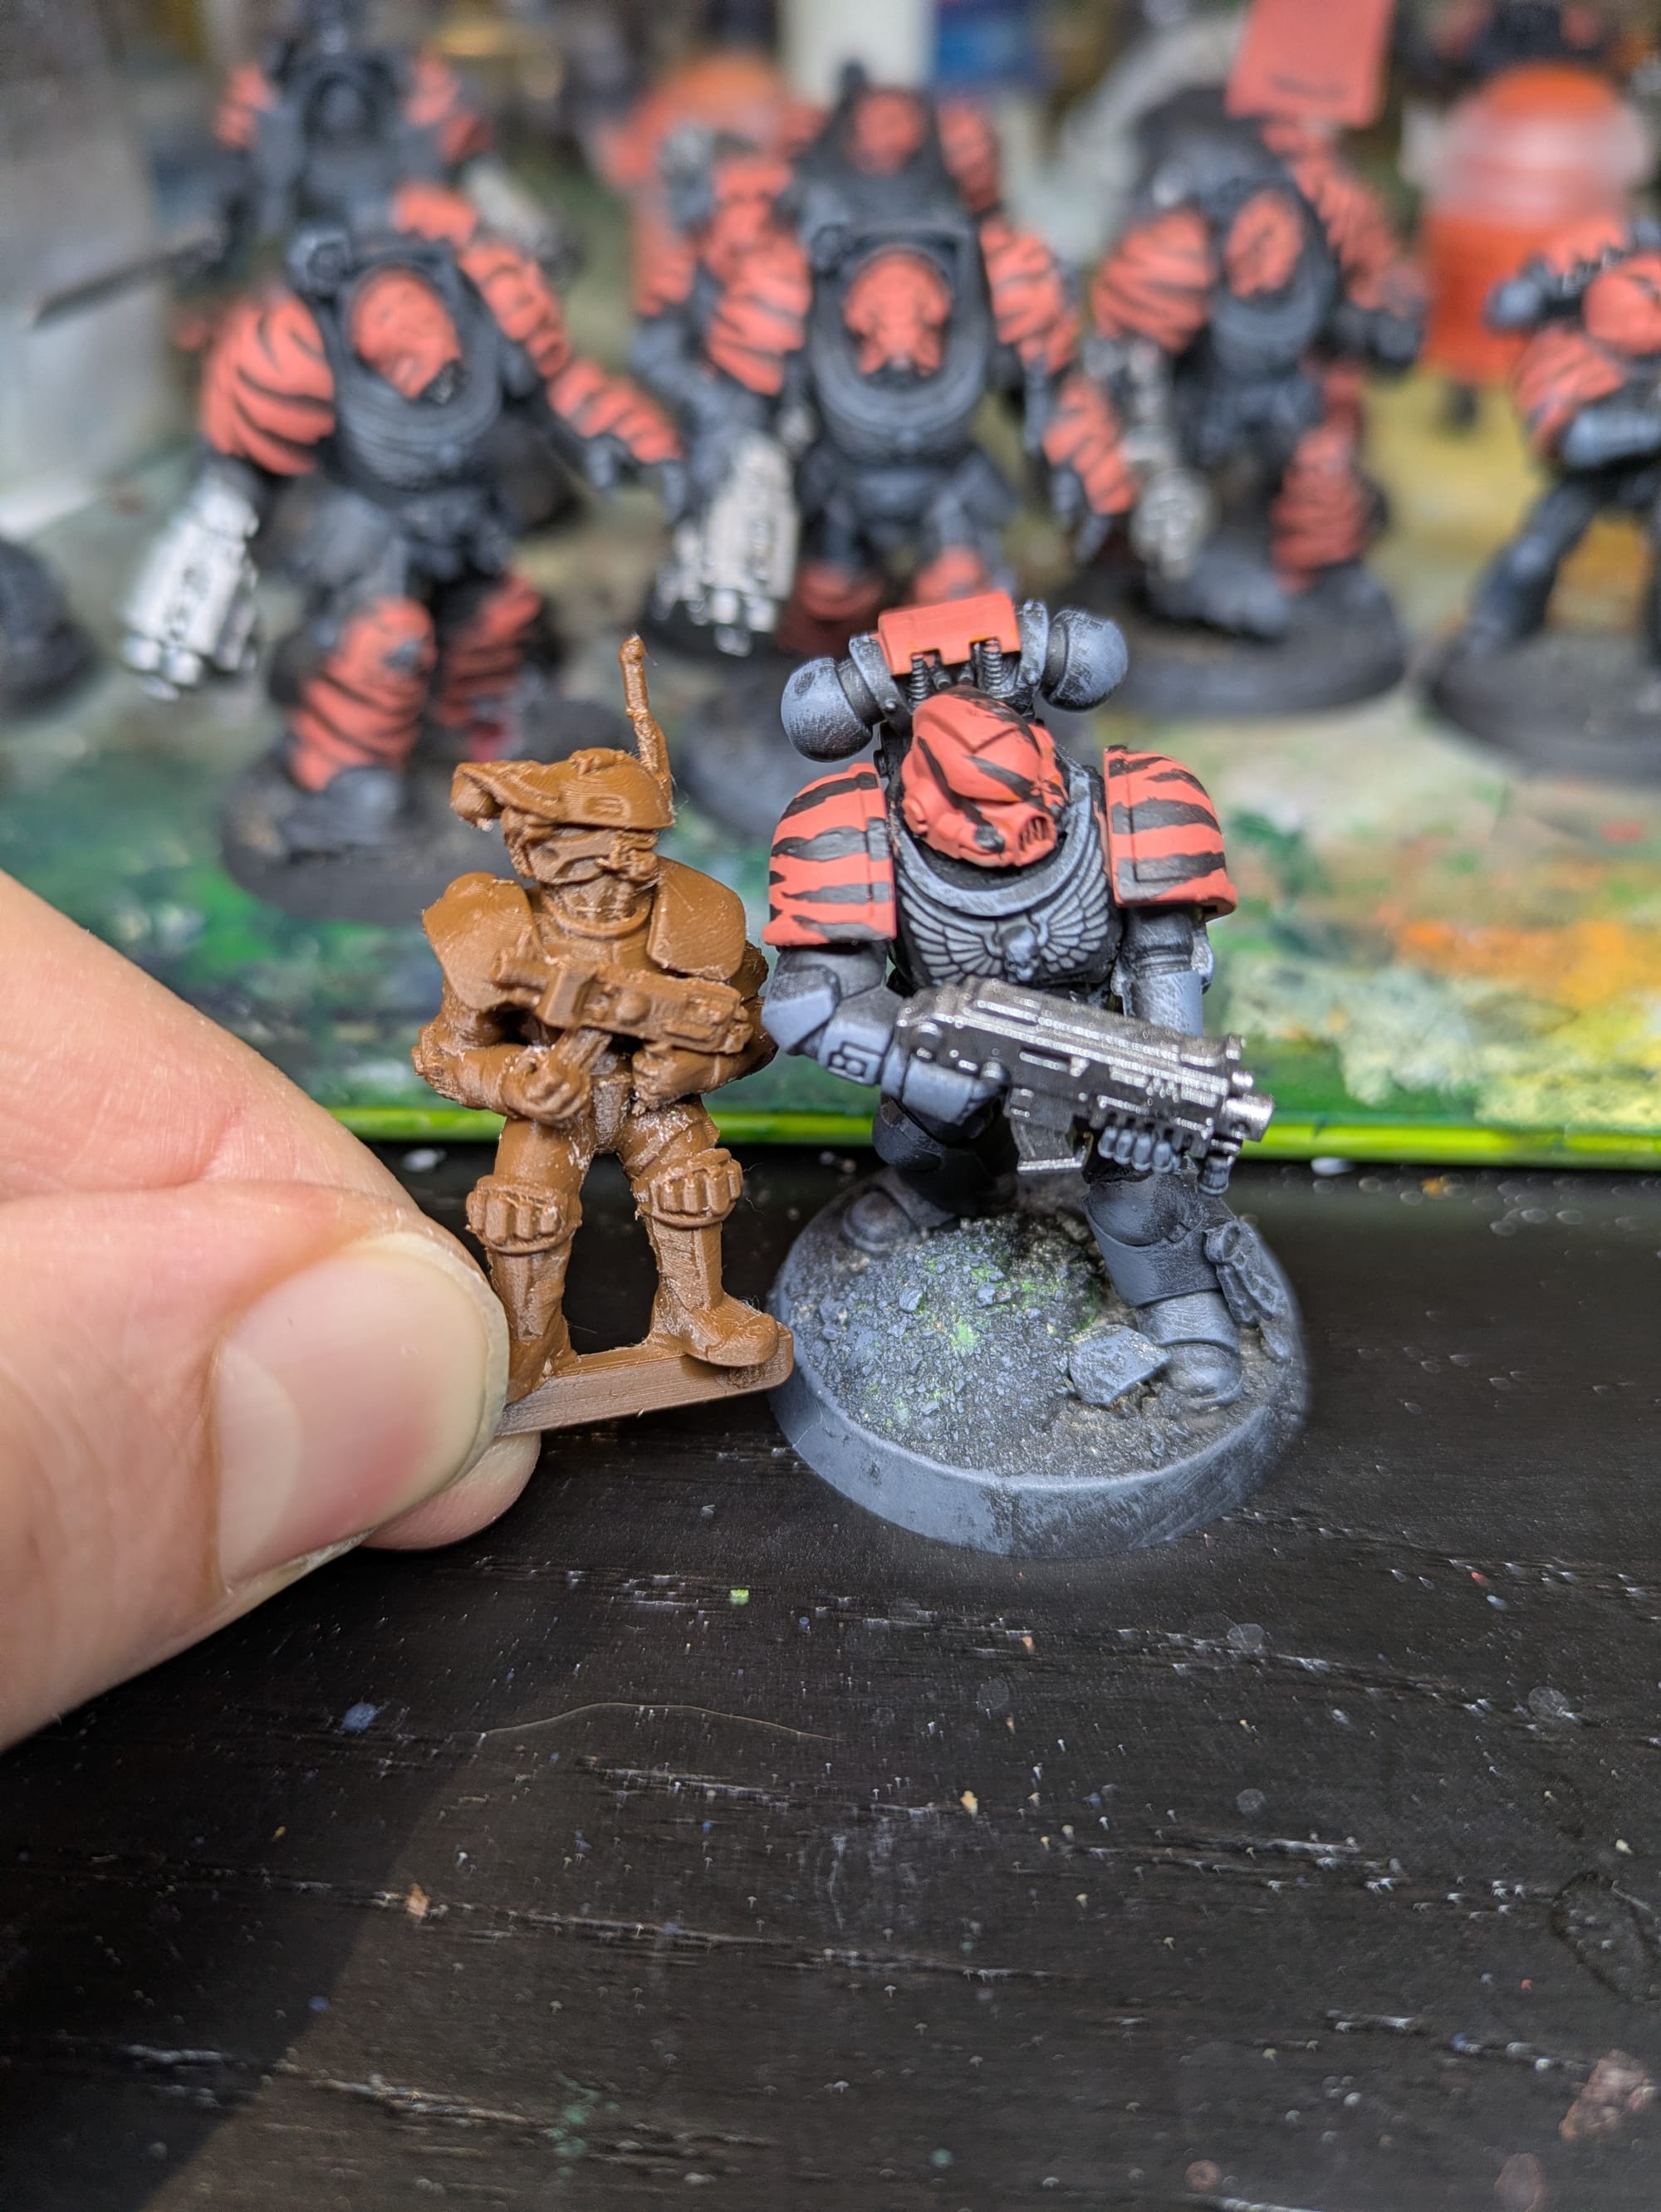
Another thing I love about BigMrTong is his models are well suited for FDM printing. They have more heroic scale proportions with simple and defined silhouettes. If you scale them up at all, then you can have a 32mm scale mini with no detail lost from FDM.
BigMrTong's From the Pages project, covering pages 122 and 109 of the Rogue Trader Rulebook.
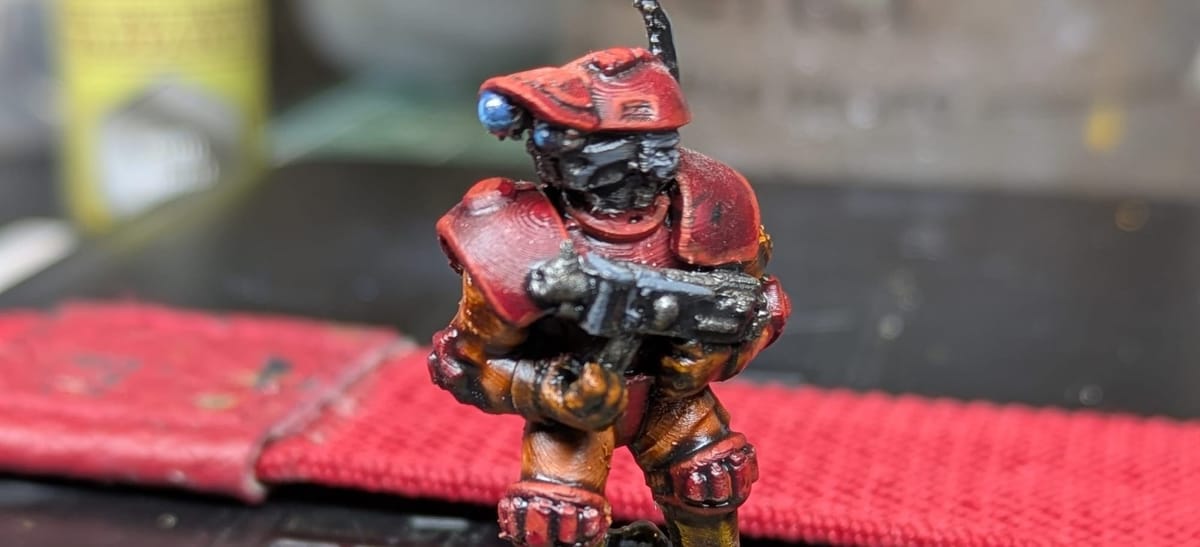
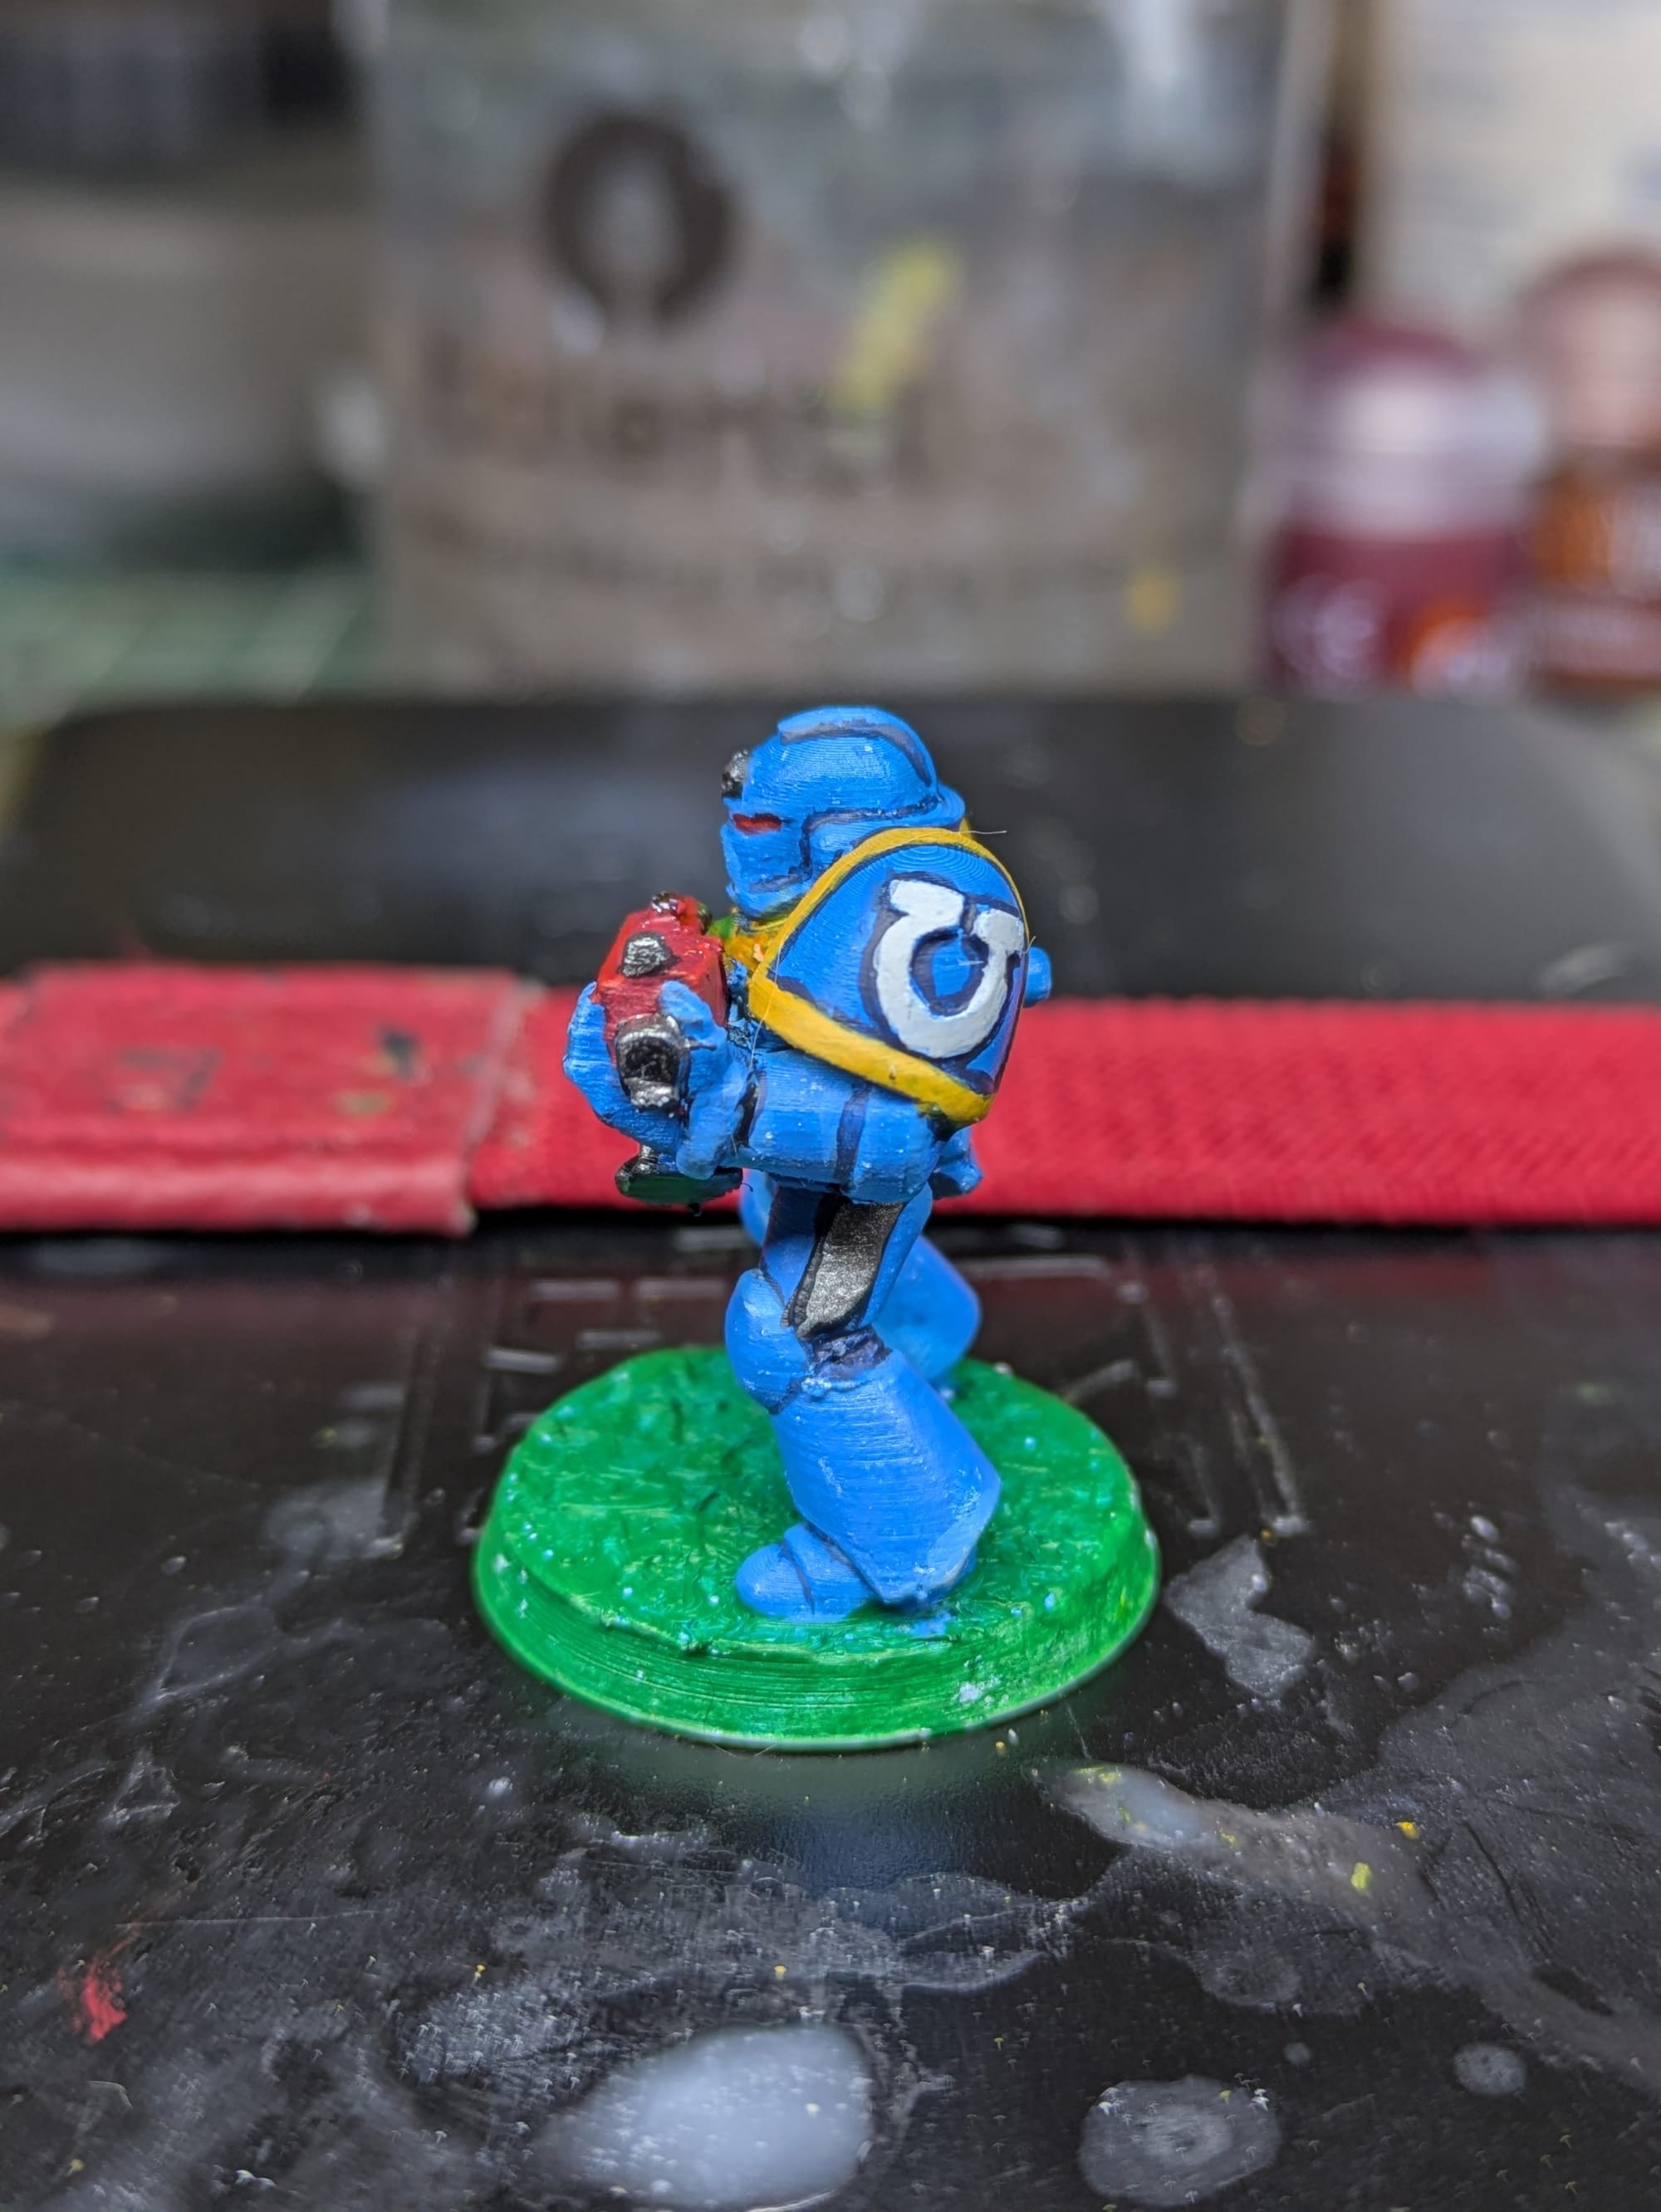
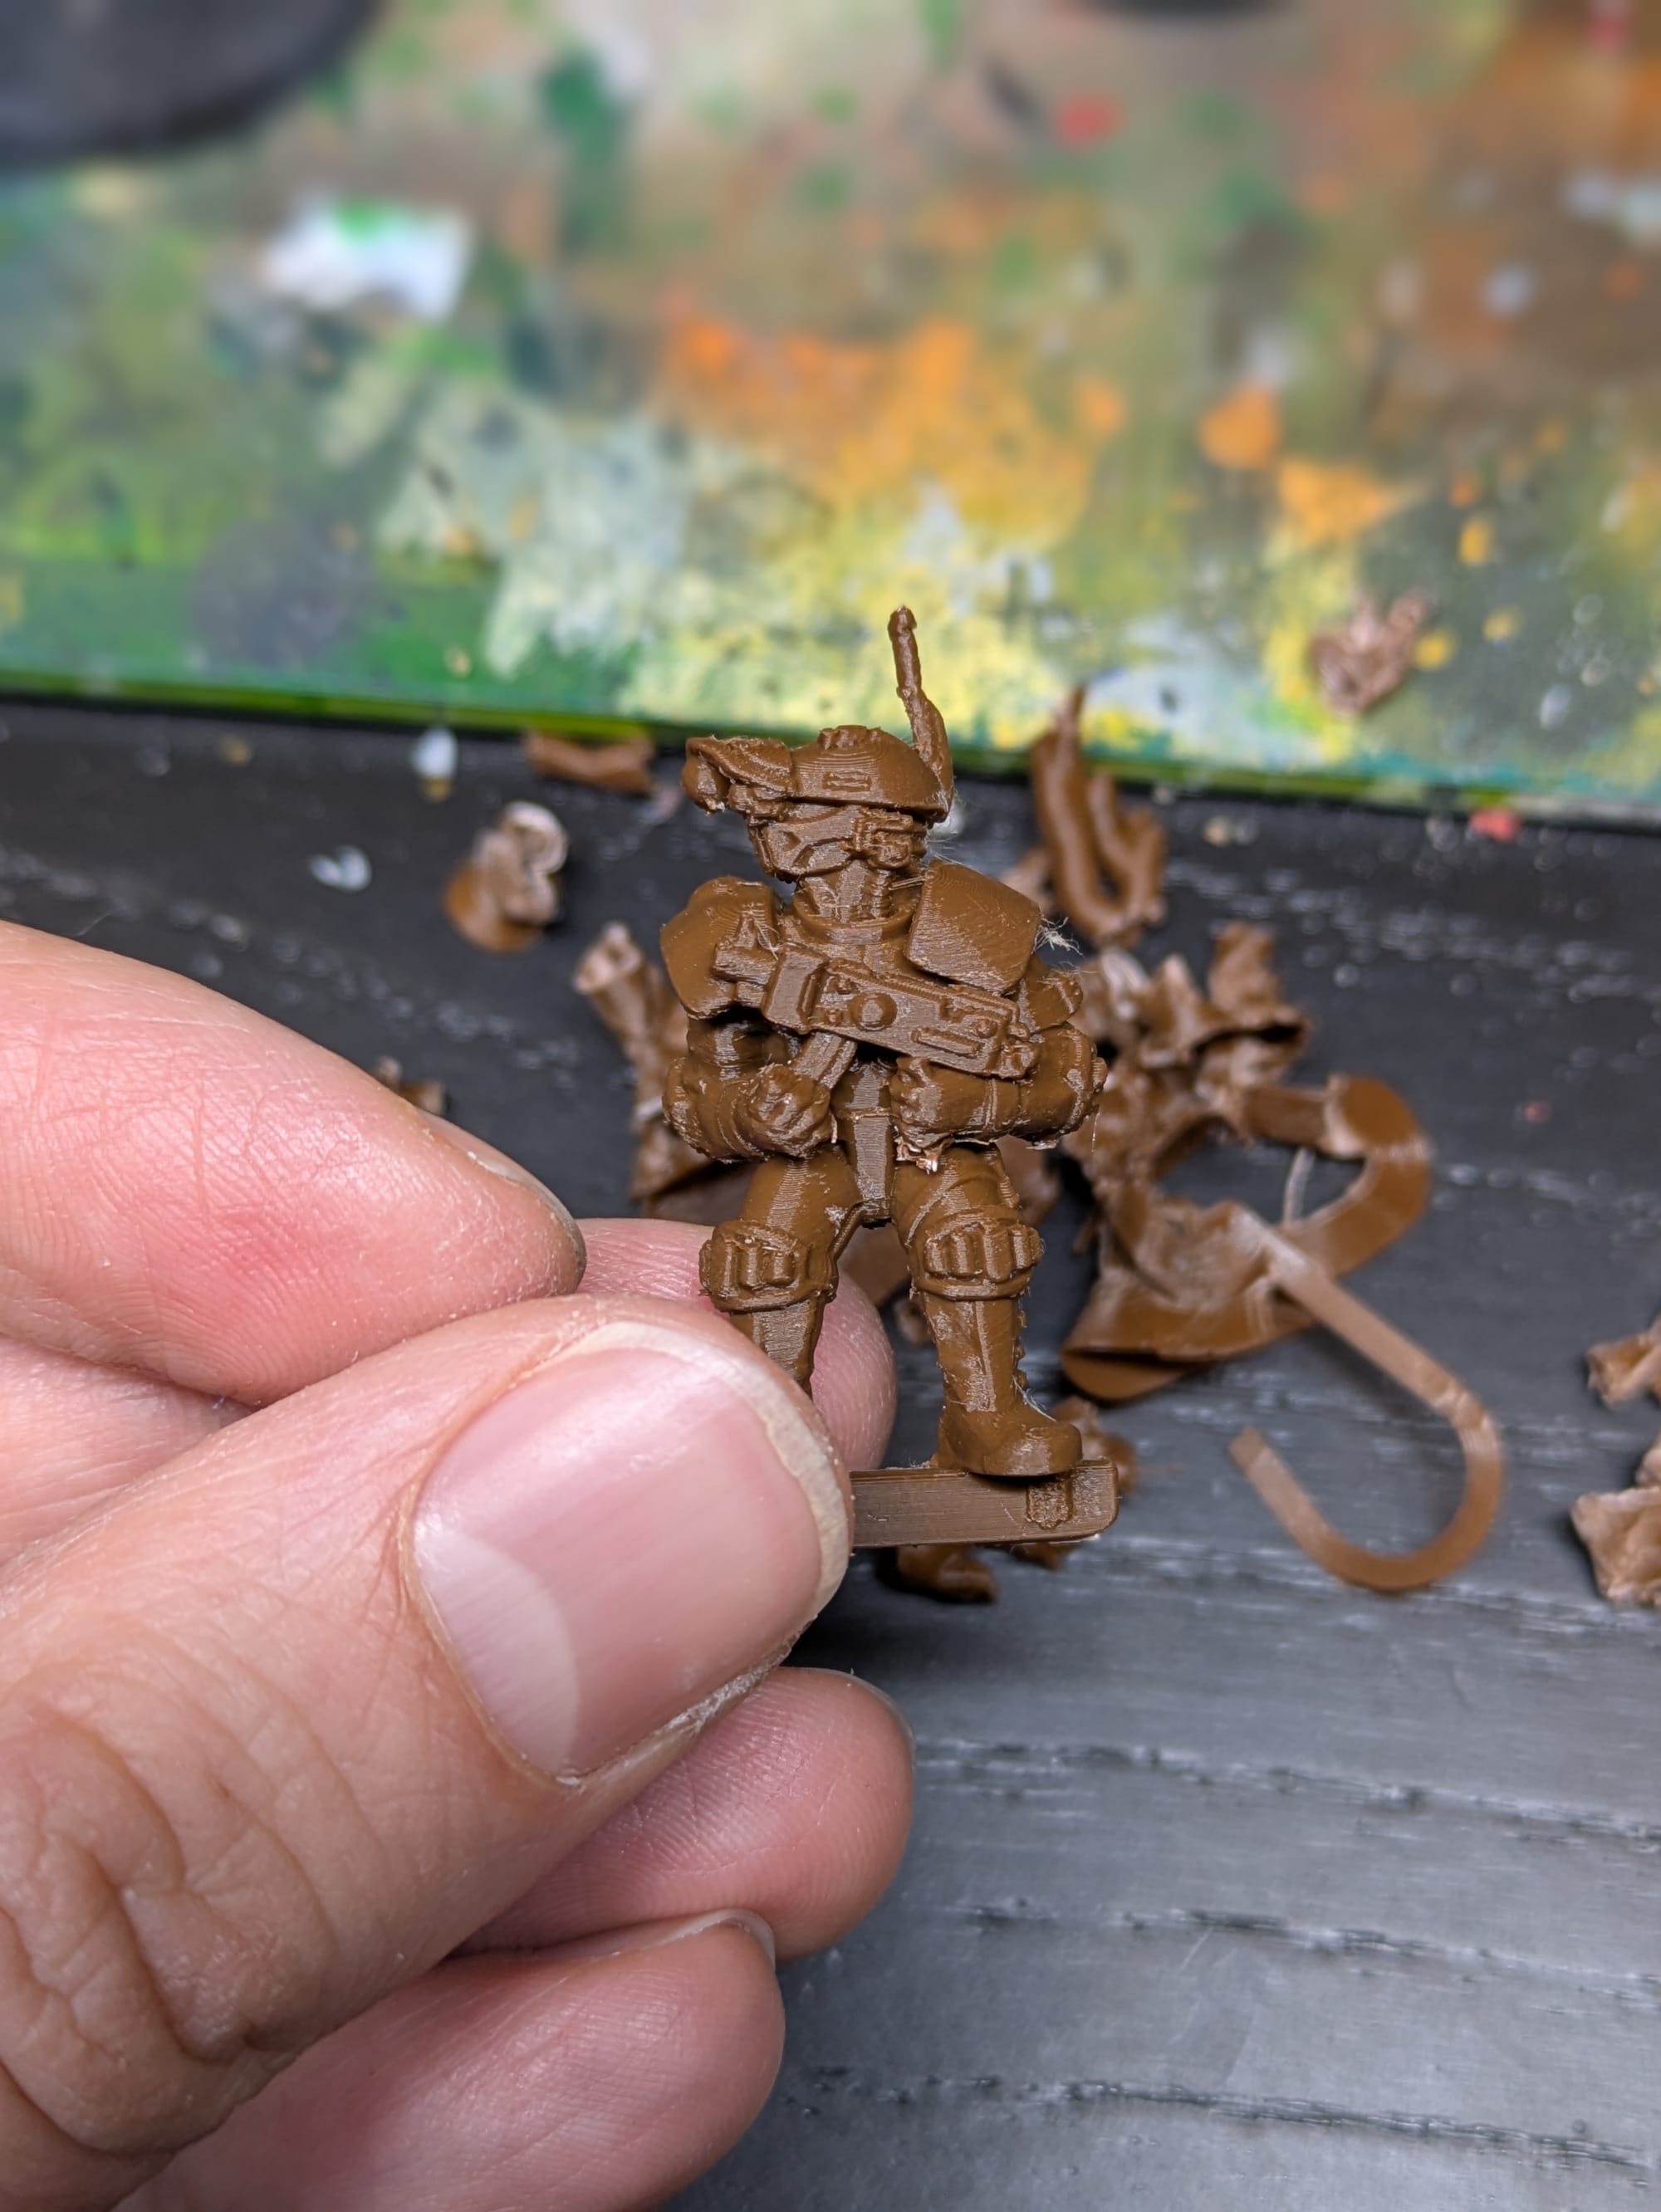
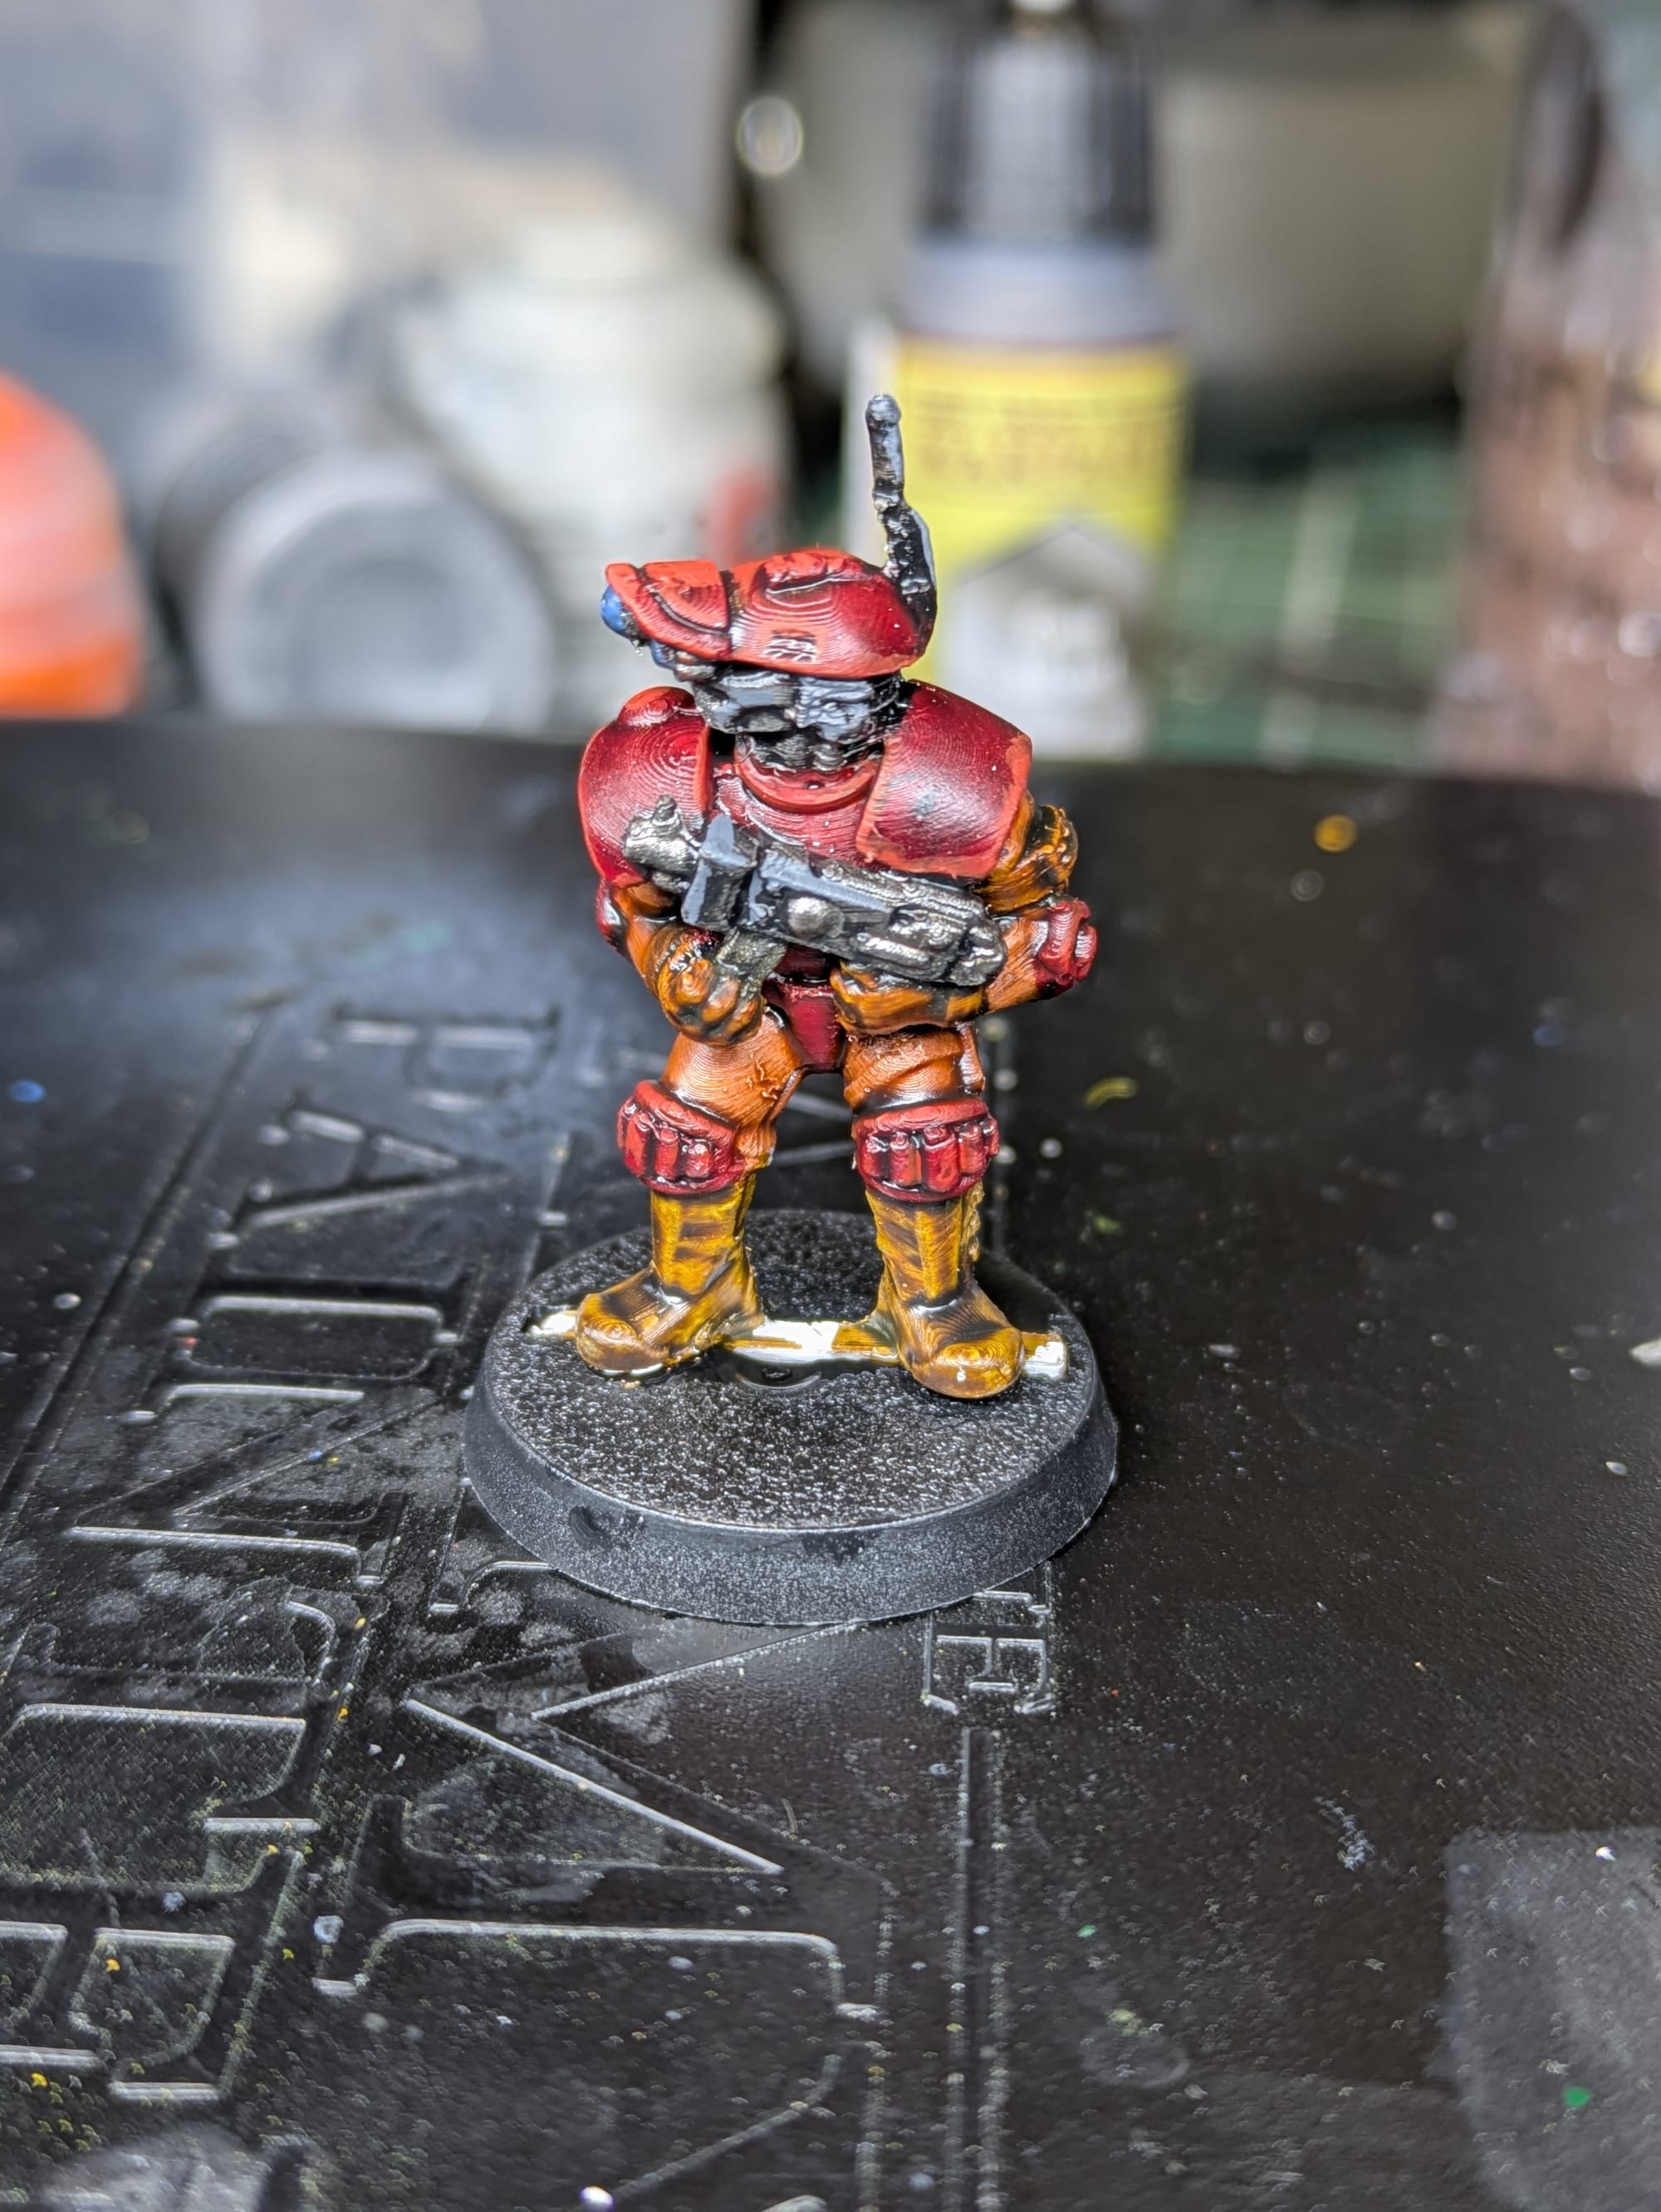
This one (122-1) looks like some kind of a robotic mercenary. For me it evokes a mix of a Star Wars droid and Tau helmet design with a cyberpunky mechanical face. He appears to carry an autogun and wear carapace armor as it was described in the RT rulebook.
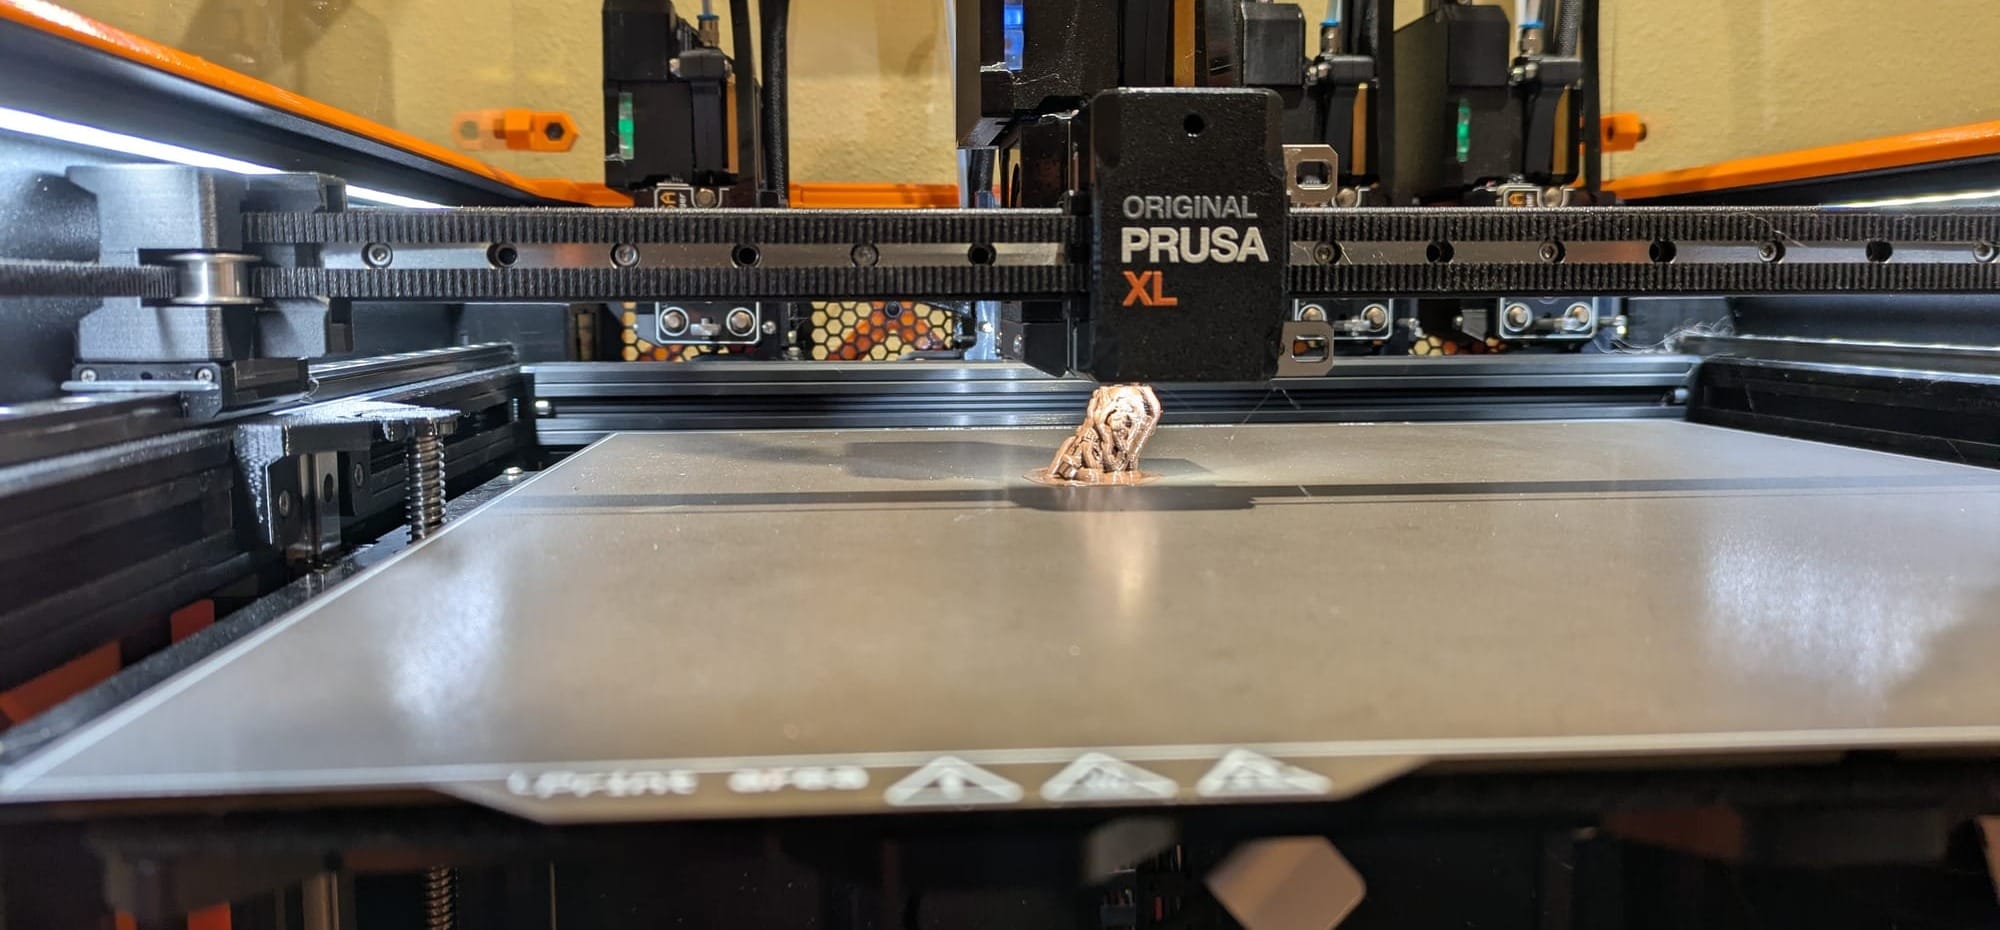
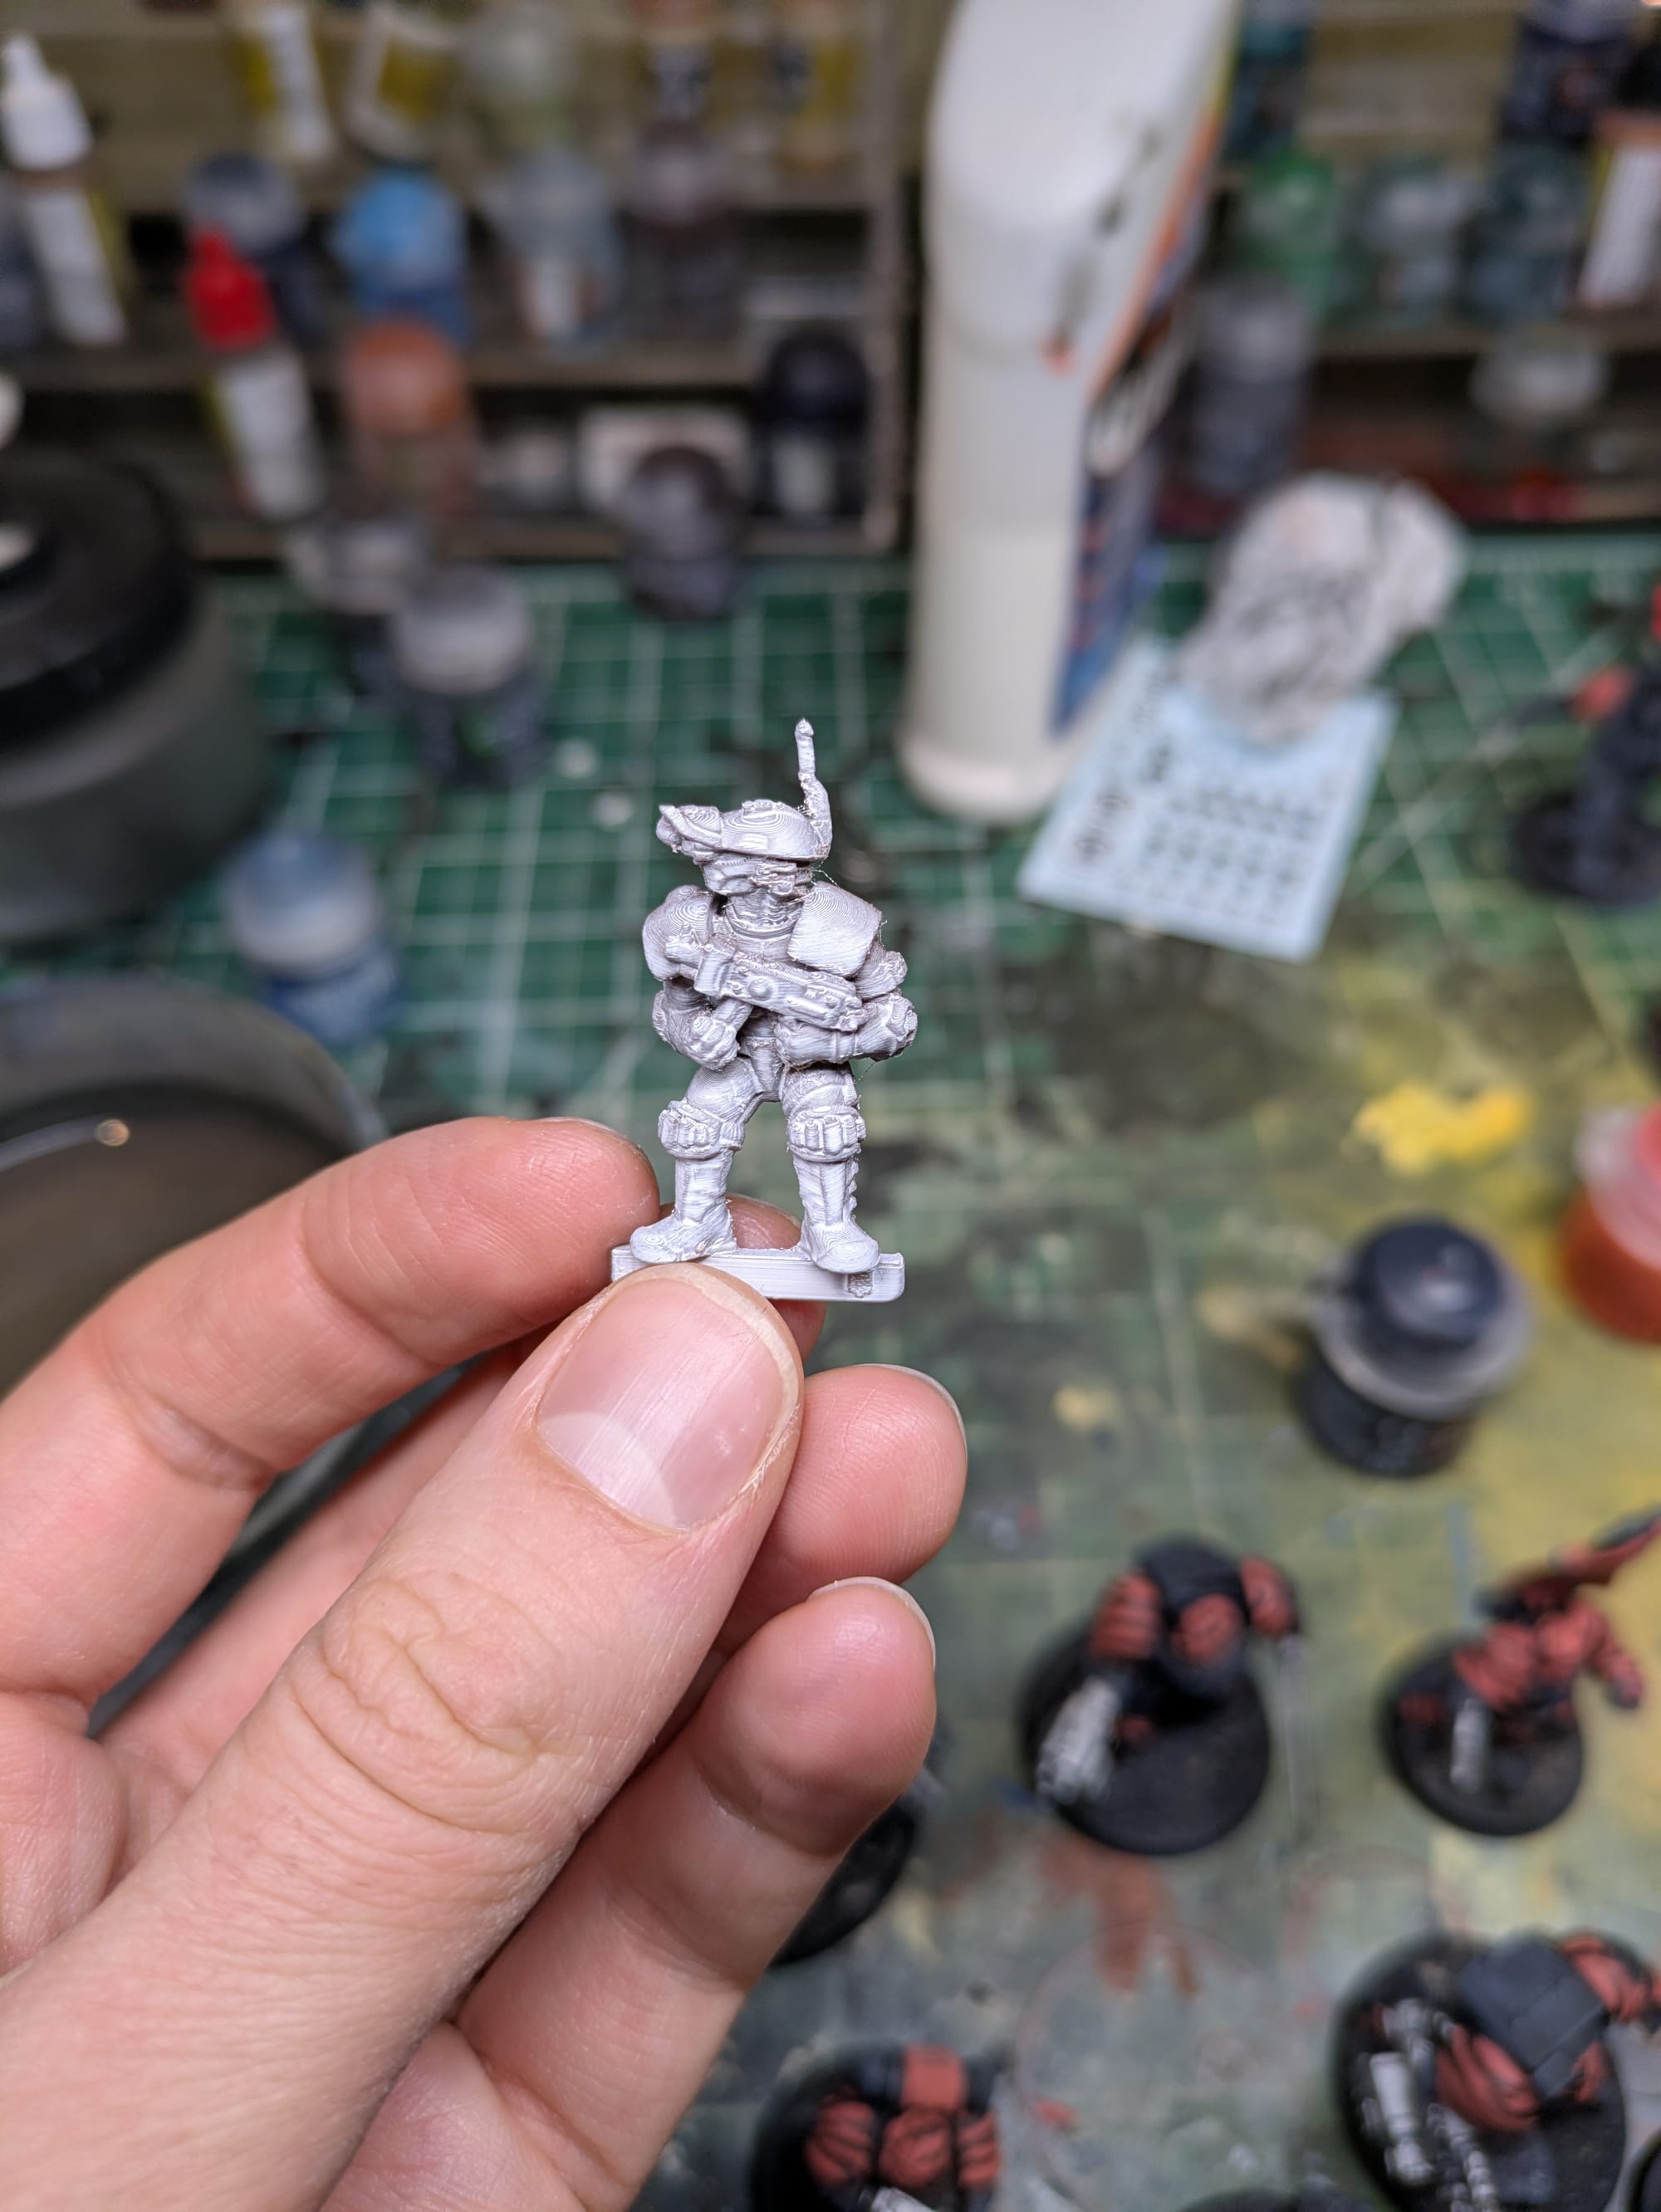
The Print
With the profile finalized, I sent the print through Prusa Connect (which is now very powerful these days.) It came out amazingly. There was no noticeable ringing, the details are crisp, the layer lines are quite minimal, and 99% of the supports came up cleanly. The top antenna shifted ever so slightly, but beyond that there were no issues. I may see about investing in a heatgun to see about clearing up the minor stringing in the future.
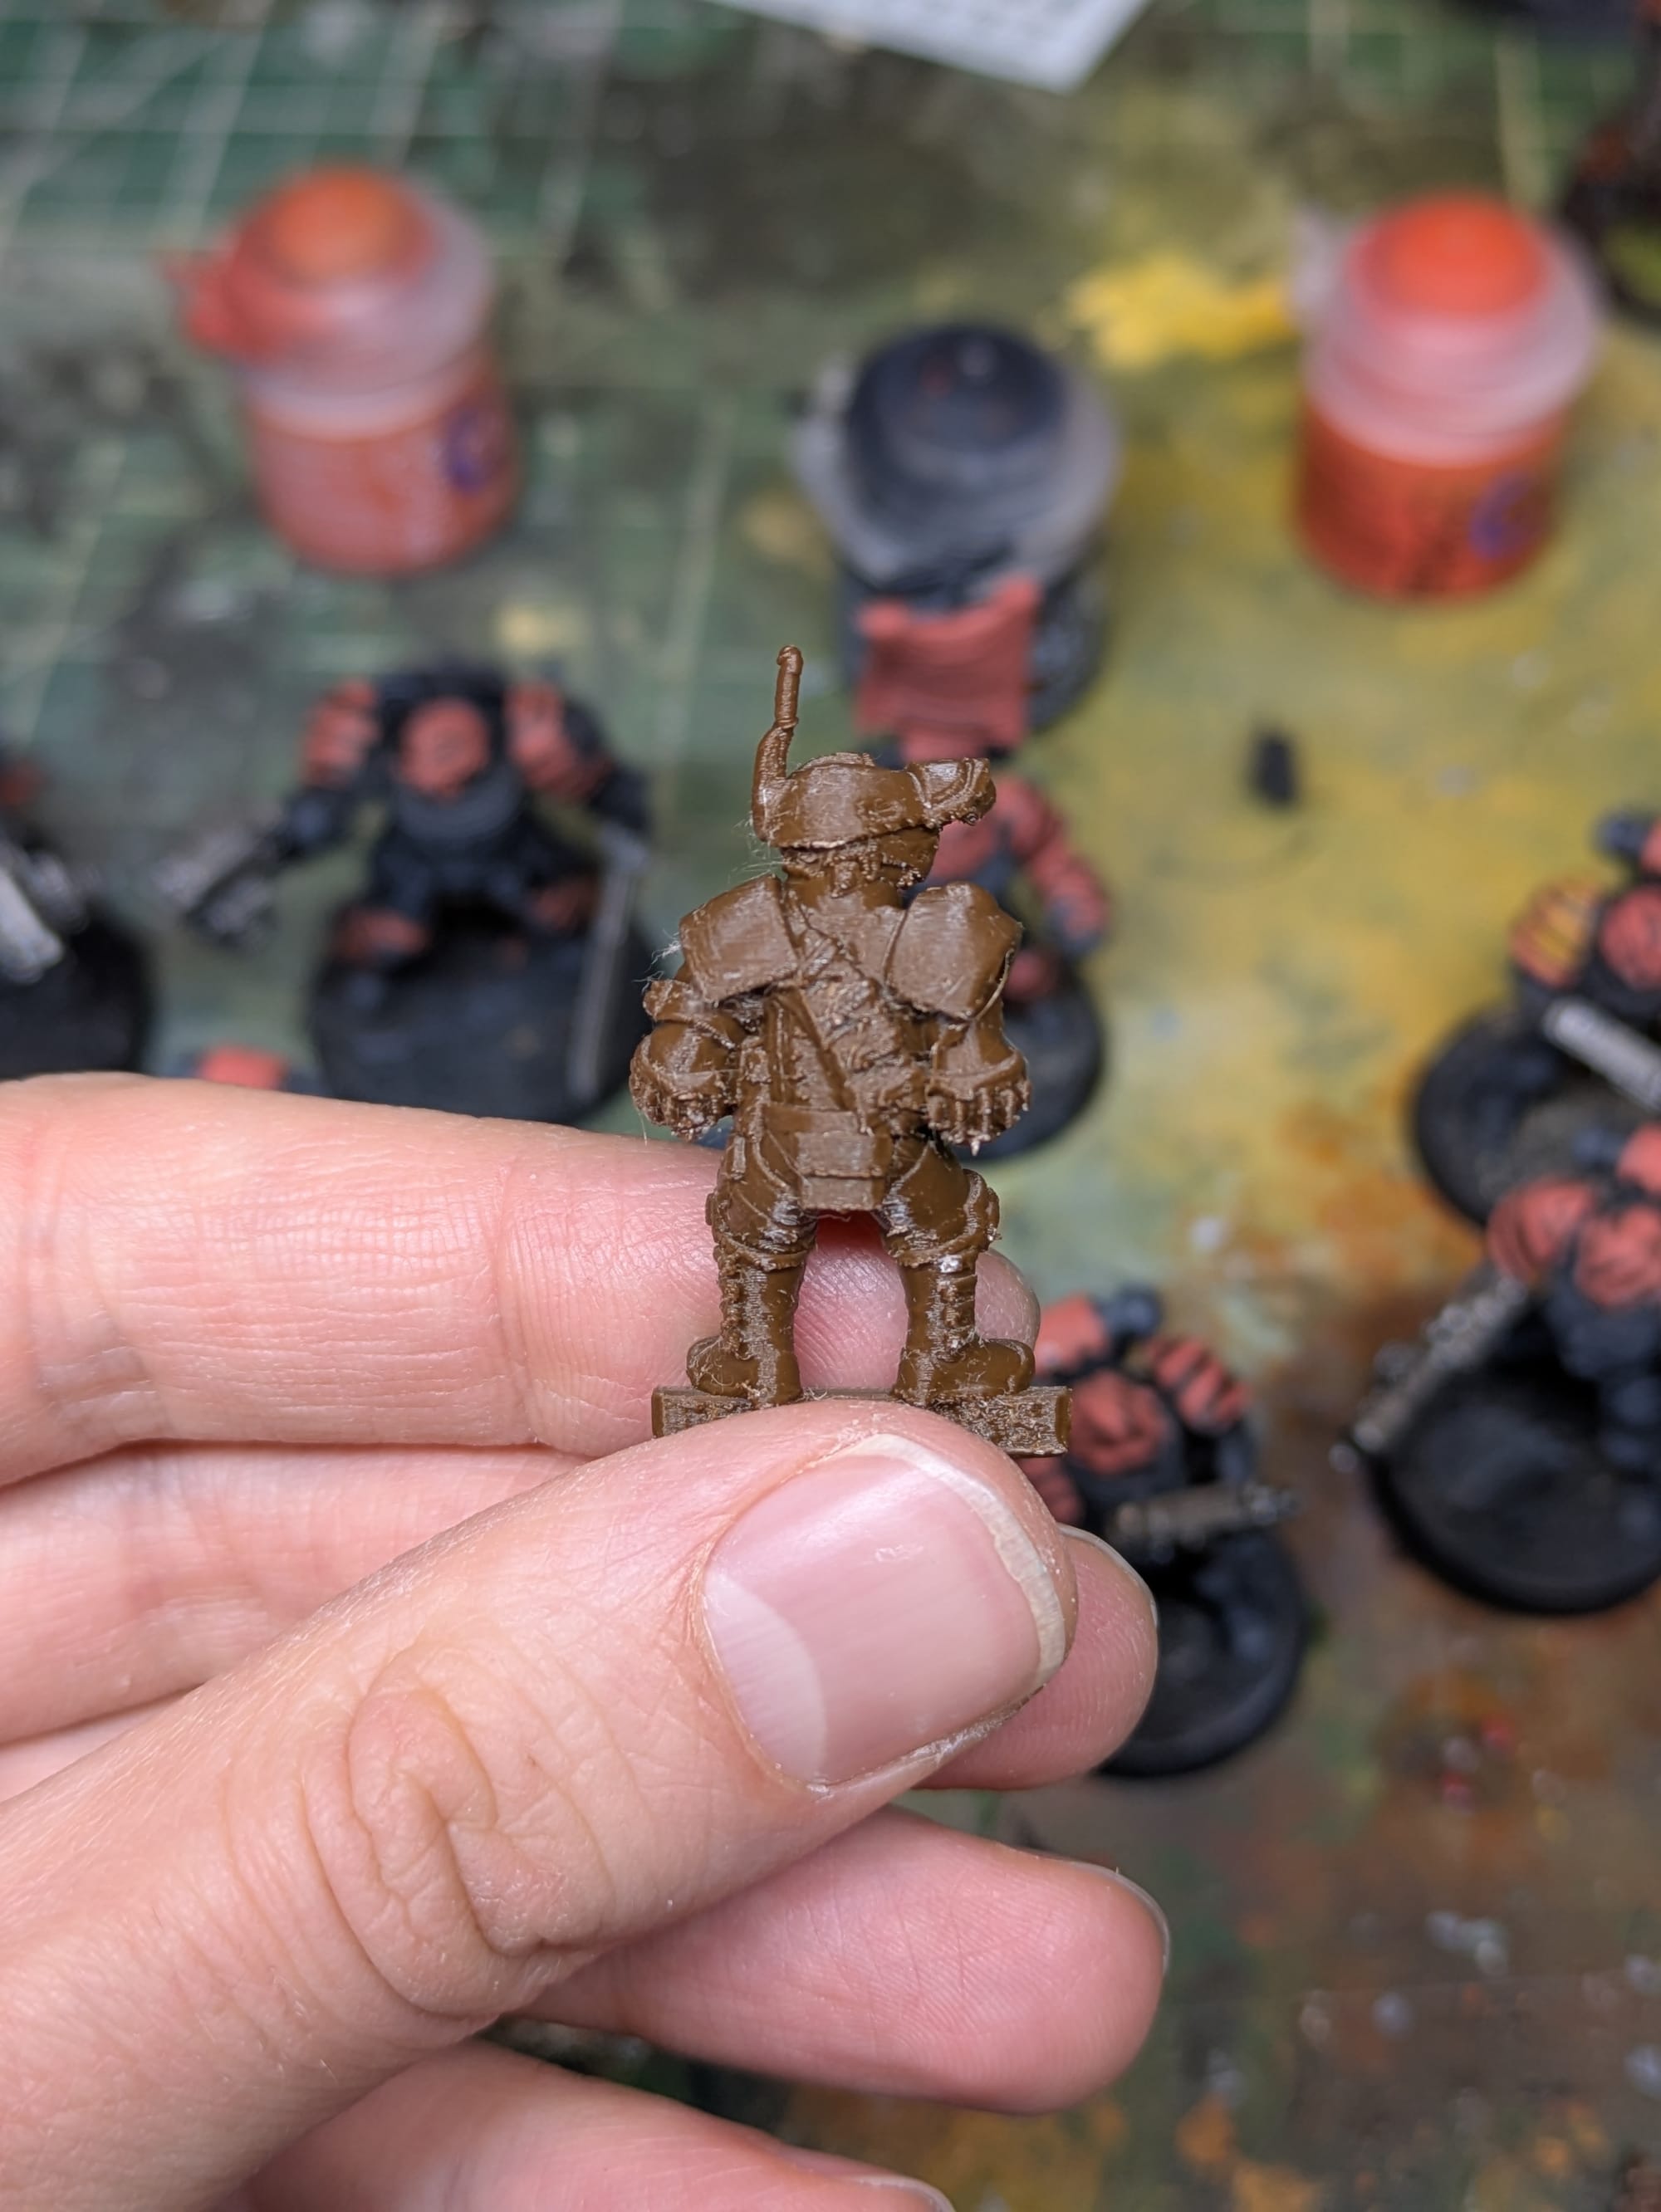

Some closeups of the print.
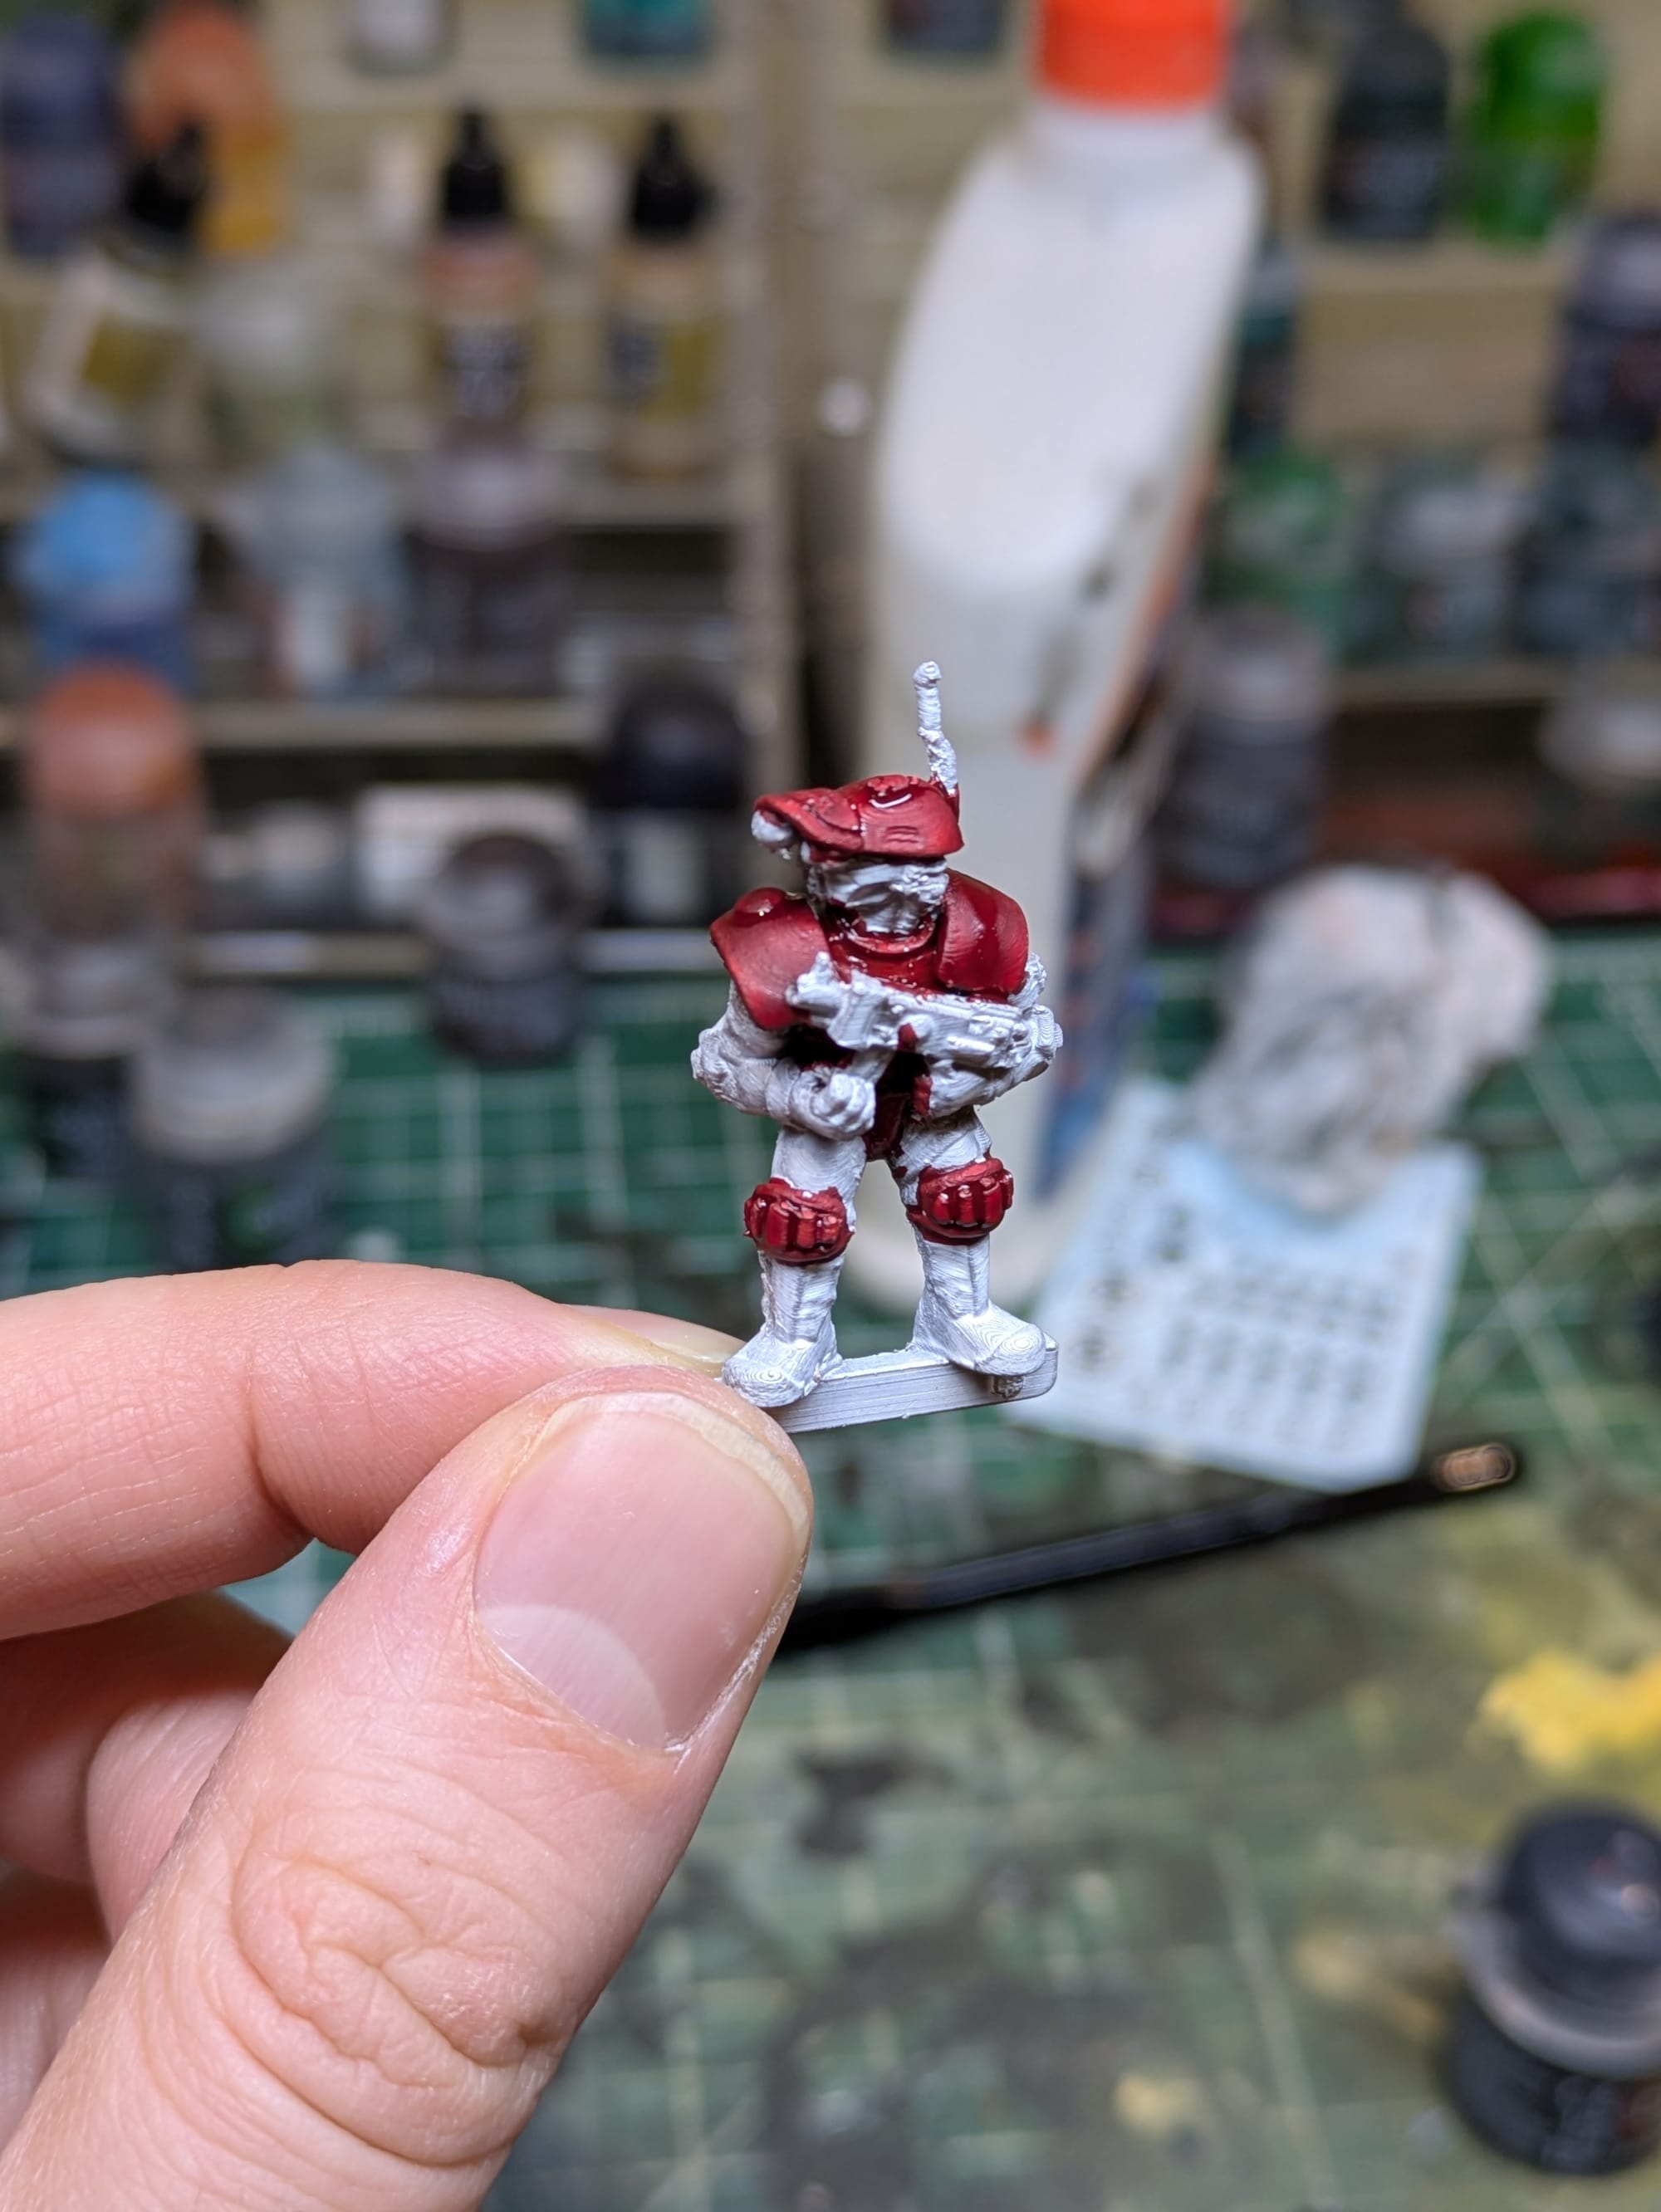
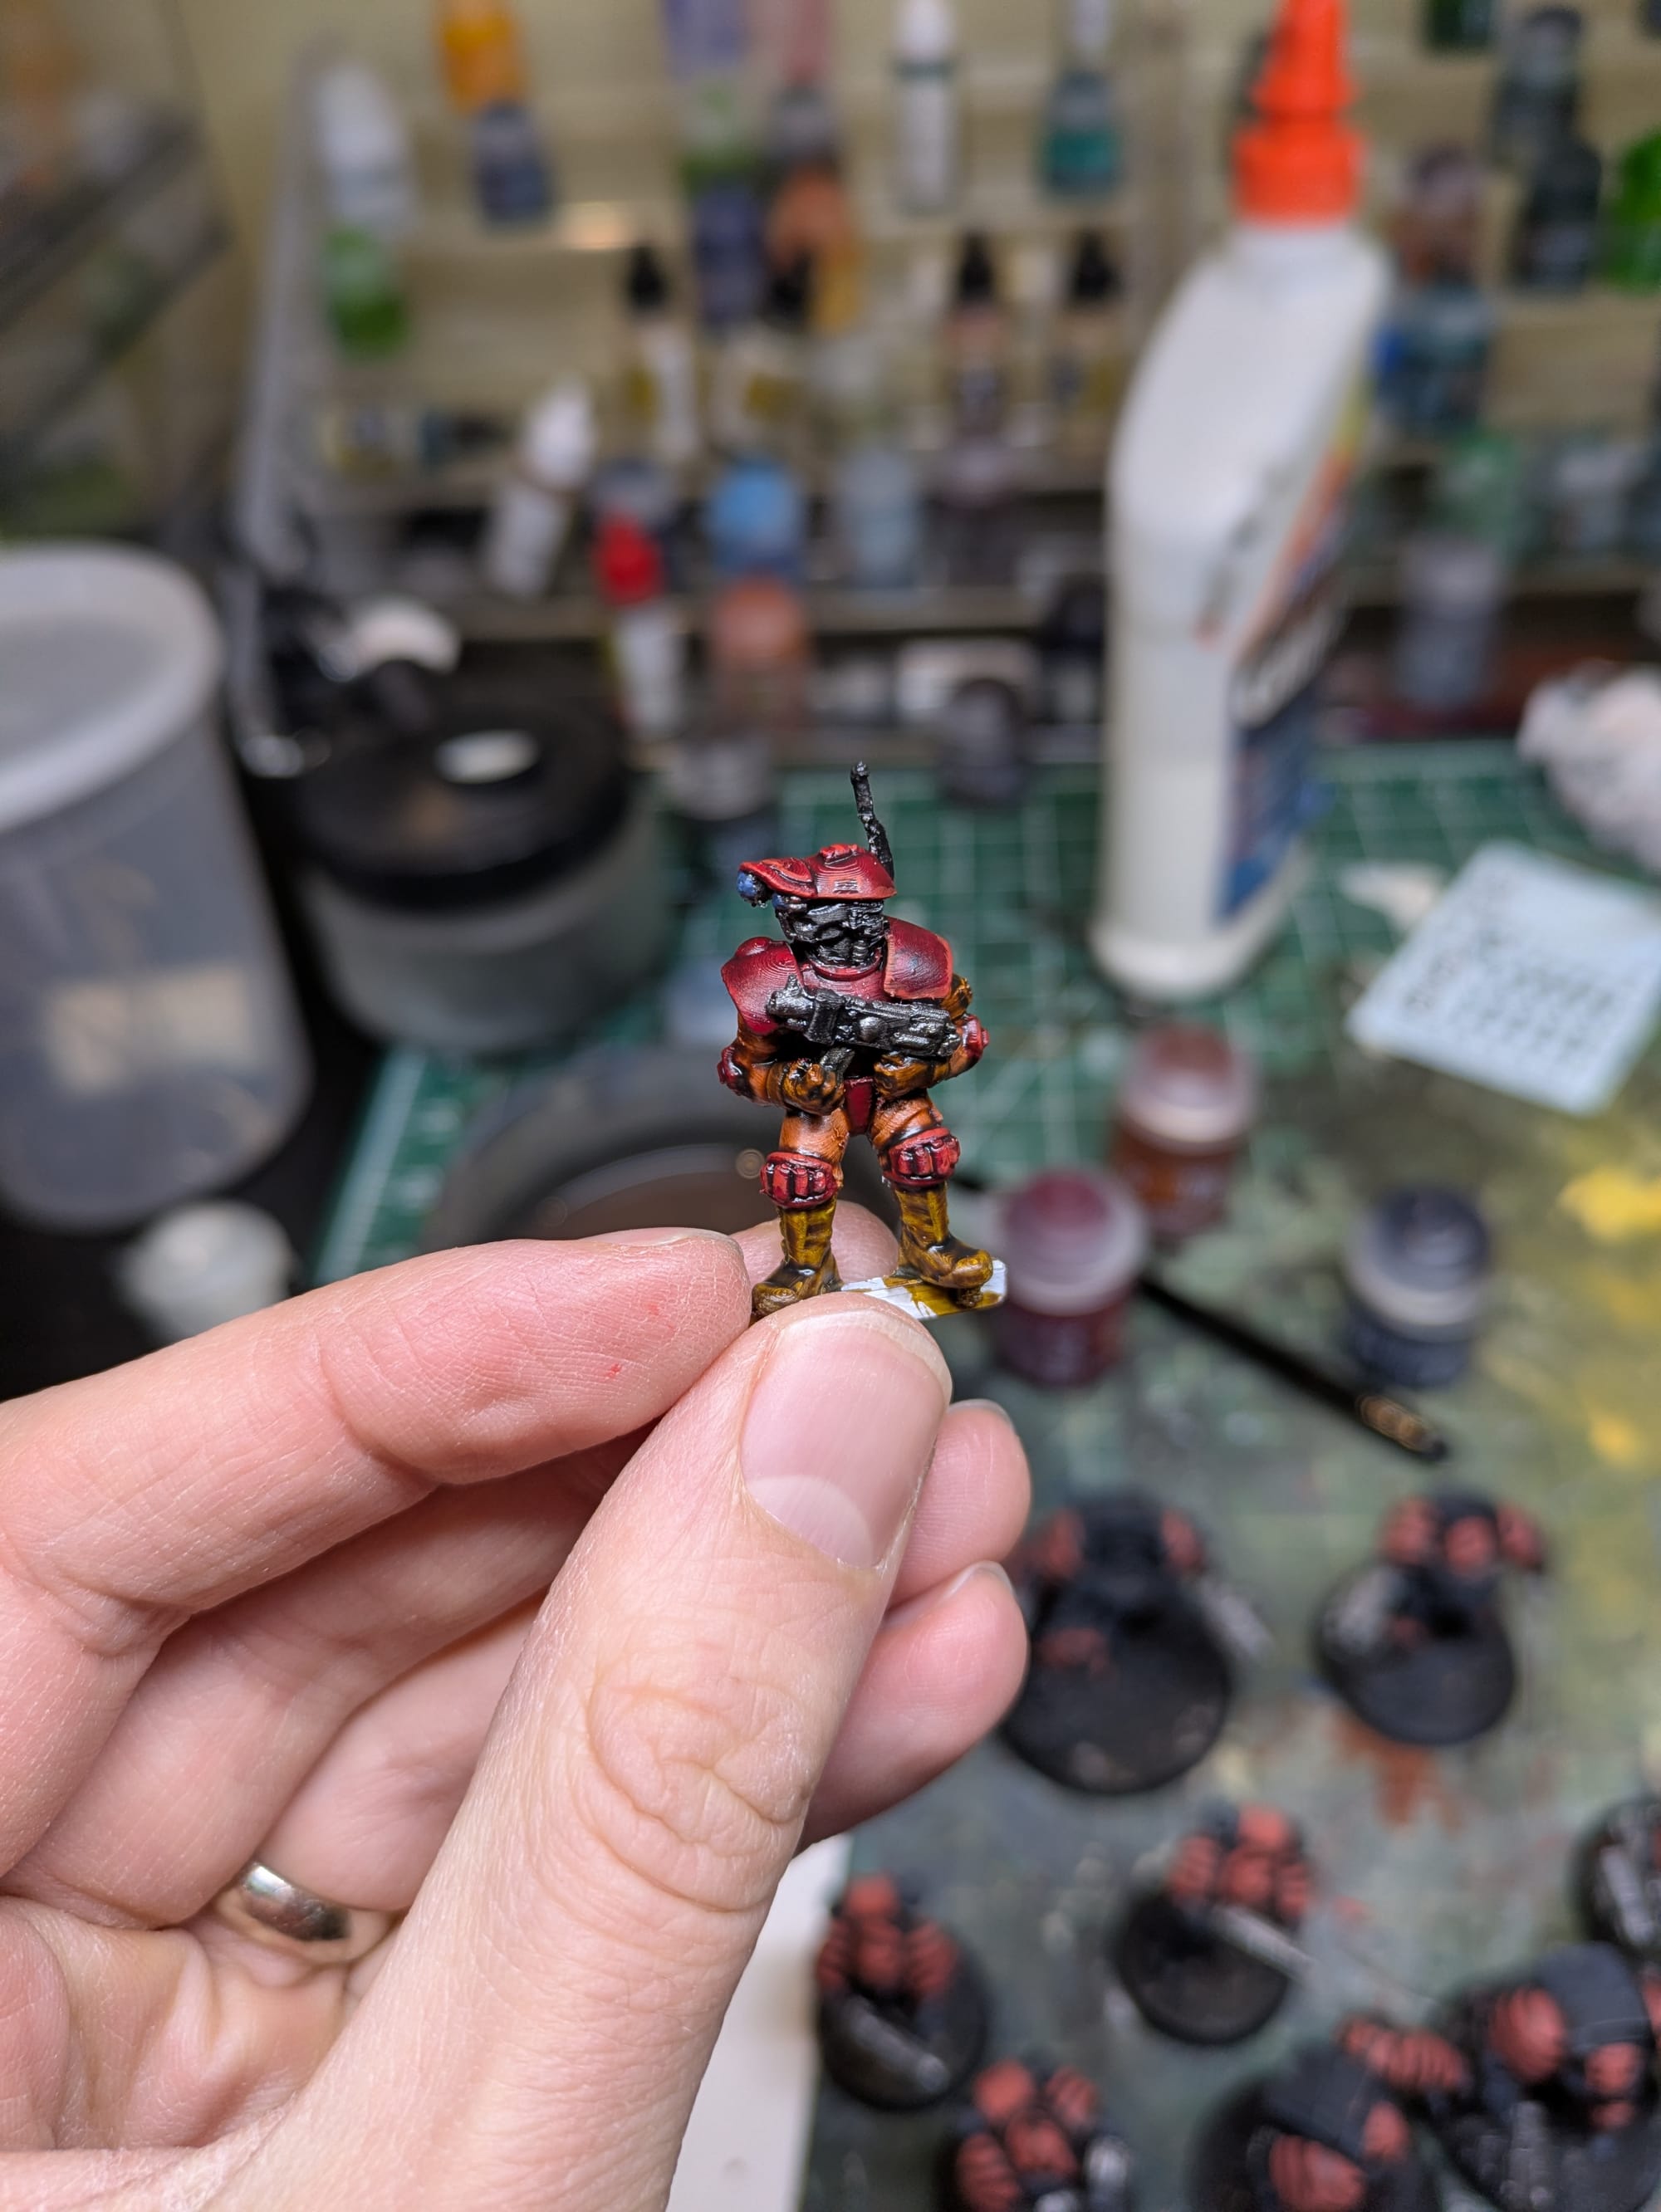
Painting the Mini
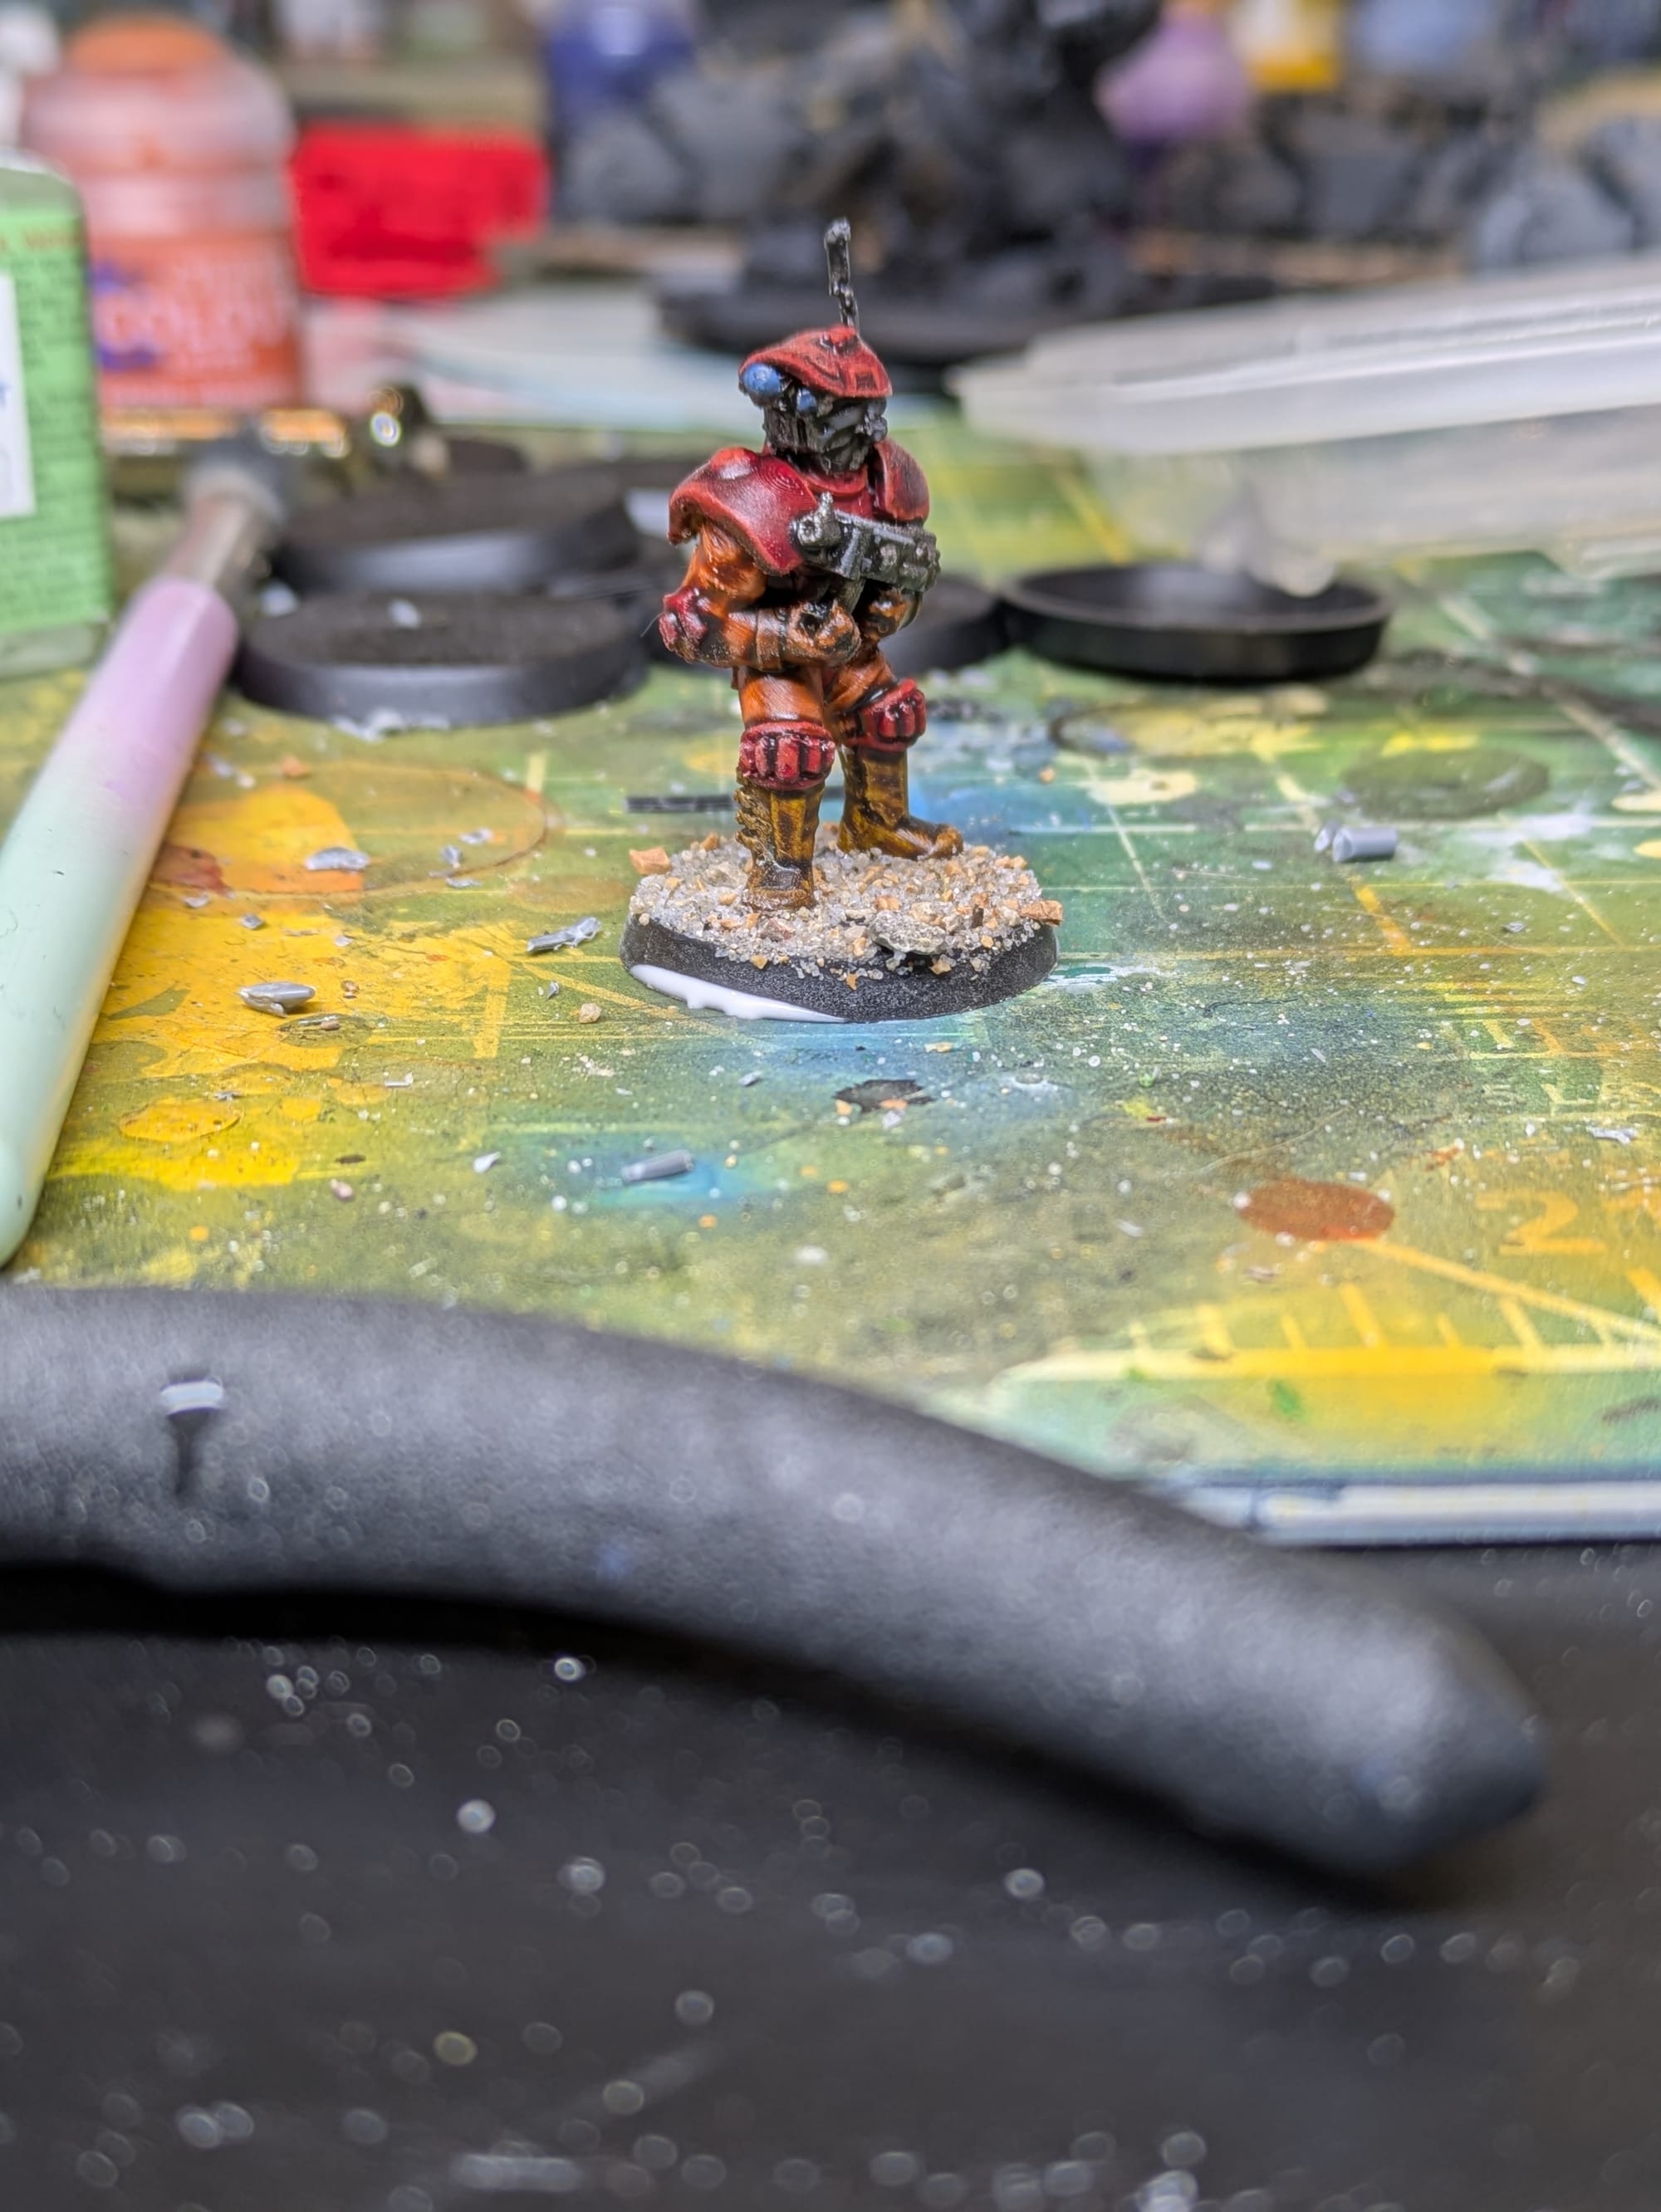
I kept the paint job simple and used mostly Contrast style paints.
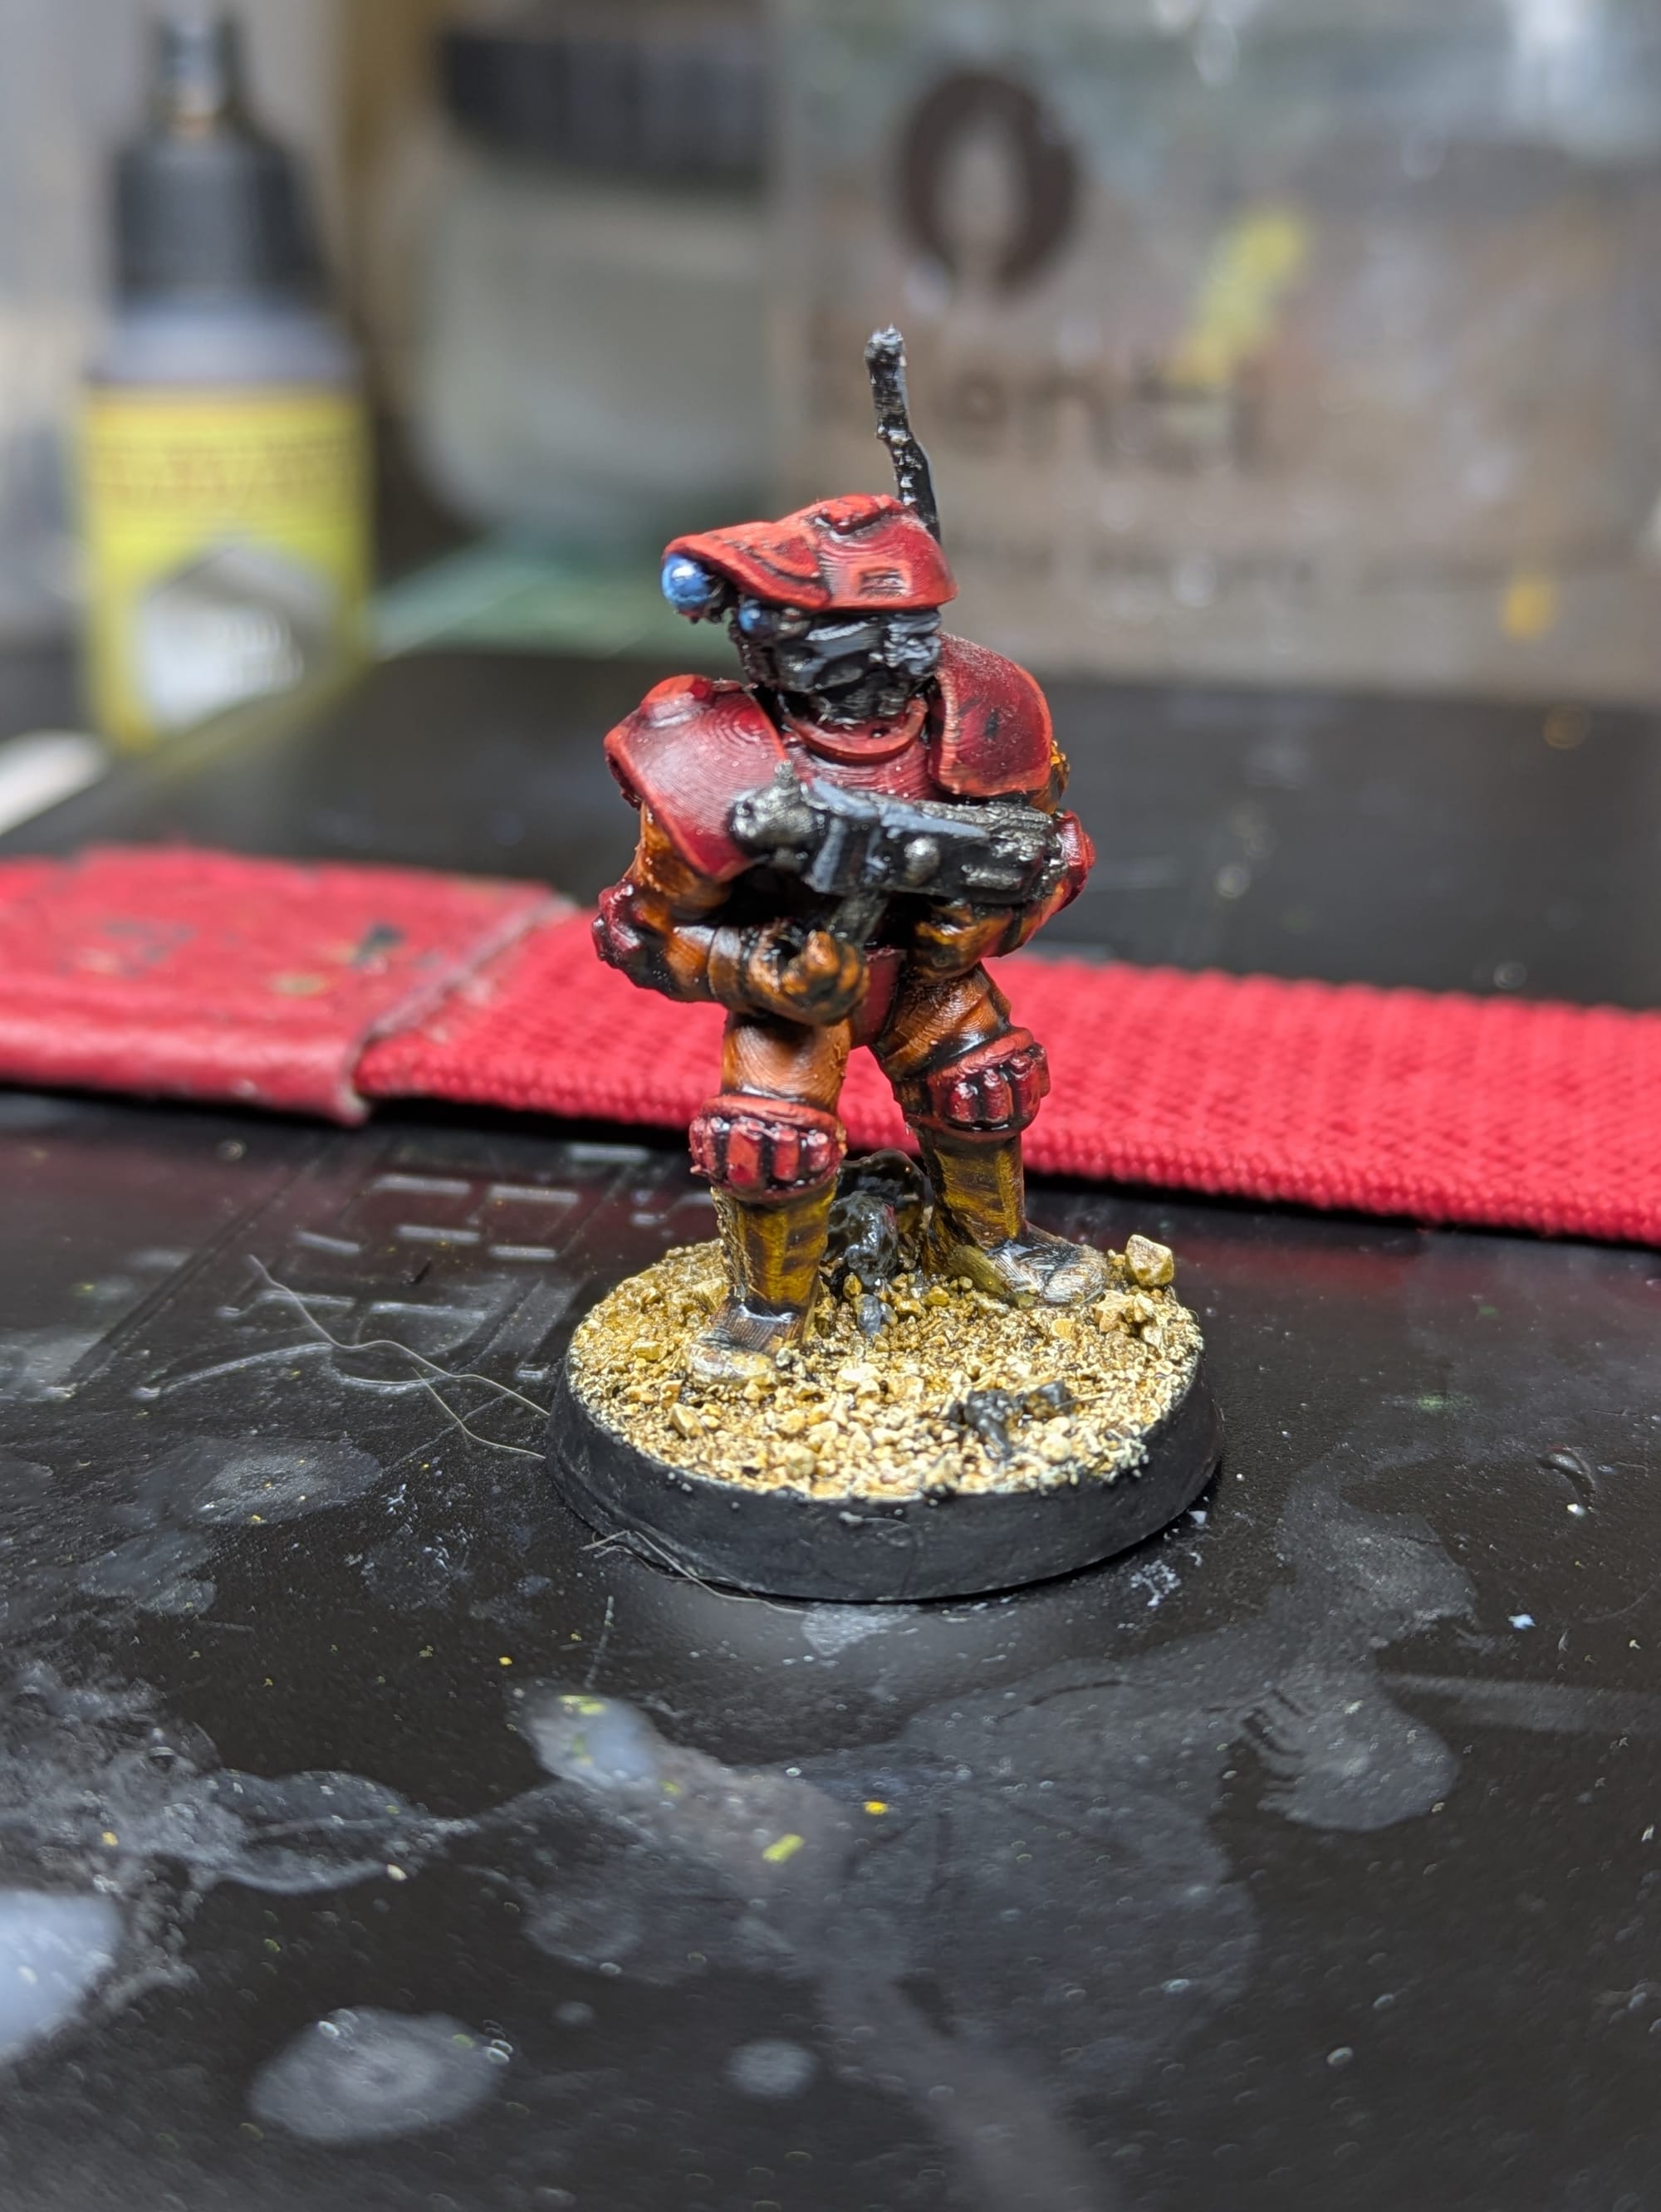

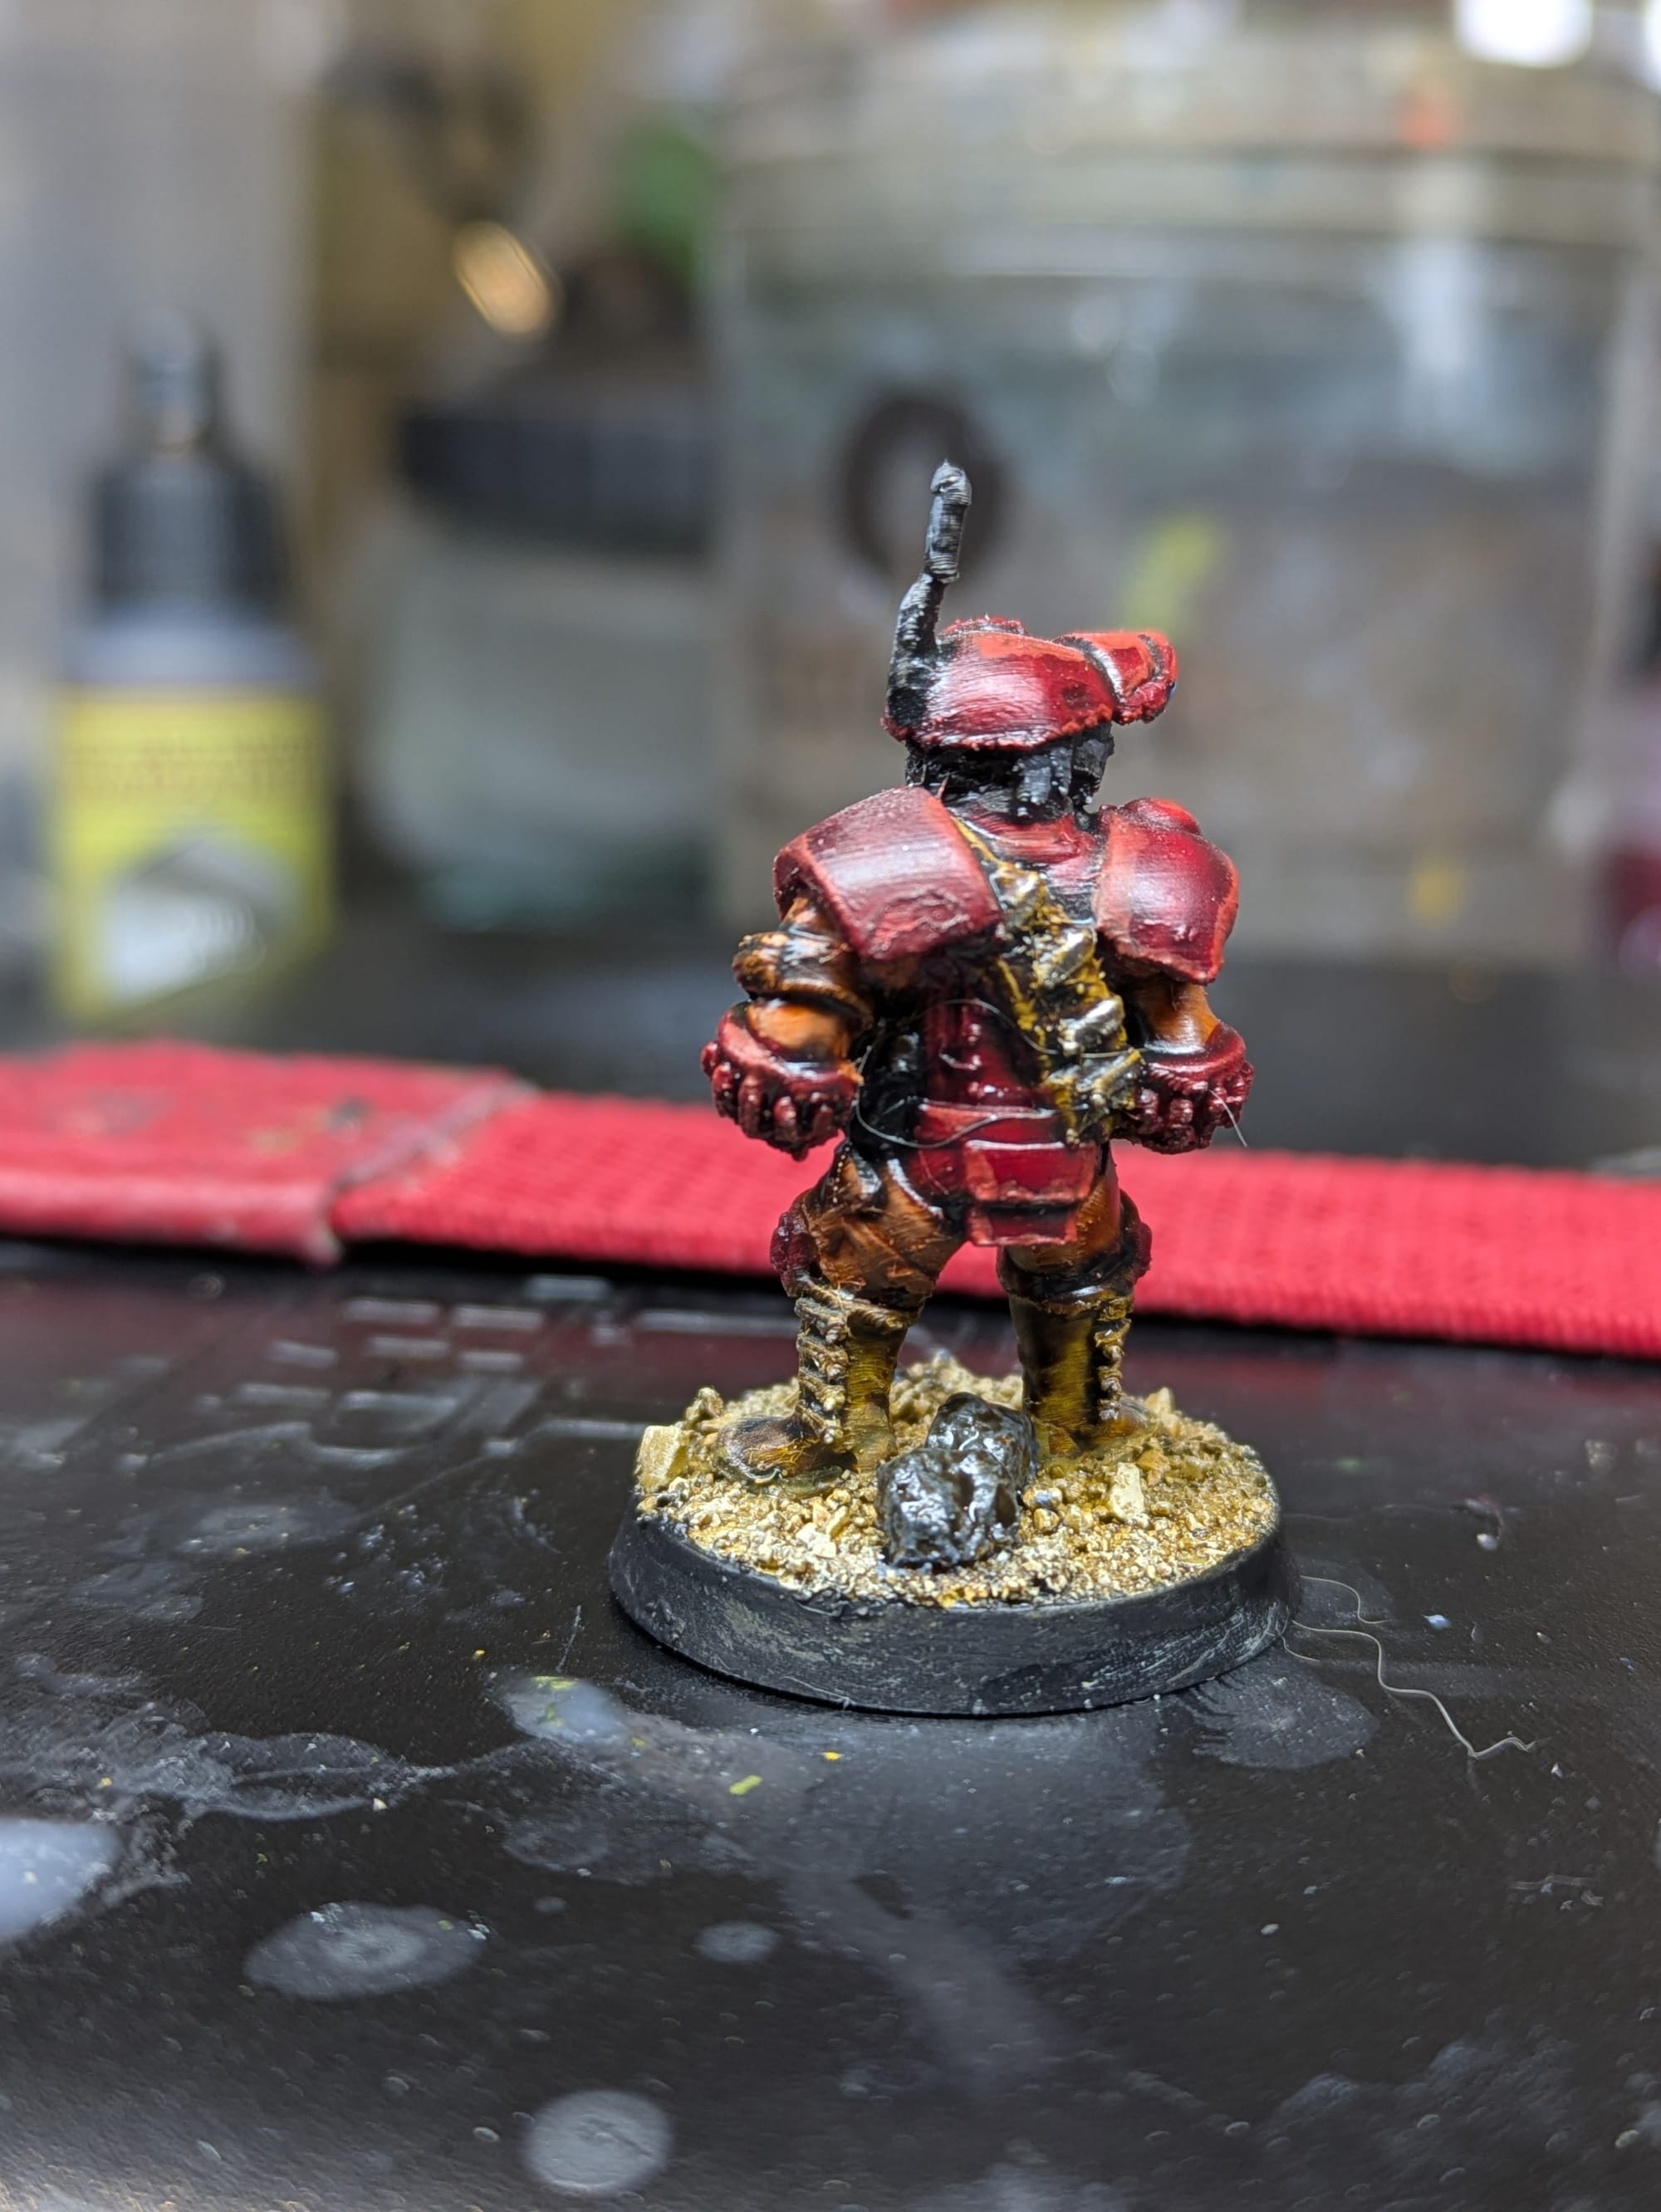
The weird ripping effect on the back is from me handling the mini while the wash was still wet... whoops!
The red armor in particular looks good with shallow highlights and the mechanical details took the wash nicely. You can see the layer lines in these photos, but at an arms length you can't tell whatsoever. I will try out filler primer in the future, as recommended by the r/FDMminiatures folk.
Here's the steps I used, in case you wanted to follow along. I am a big contrast paint fan and think it's perfect for whipping up a quick demo model:
- Primed with Rustoleum white primer
- Flesh Tearers Red contrast on the armor
- Gryph Hound Orange contrast on the under suit
- Snakebite Leather contrast on boots gloves straps and the bandolier
- Army Painter Grim Black on the gun the face area and the antenna
- Army Painter Gun Metal on the gun and metal accents
- Nuln Oil wash over the whole figure
- Wild Rider Red for red armour highlights and a helmet layer
- Mechanicum Standard Gray highlighting the black areas
- Alaitoc Blue for the lens base color
- Hoeth Blue for the lens accent
- Corax White dot for the lens reflection
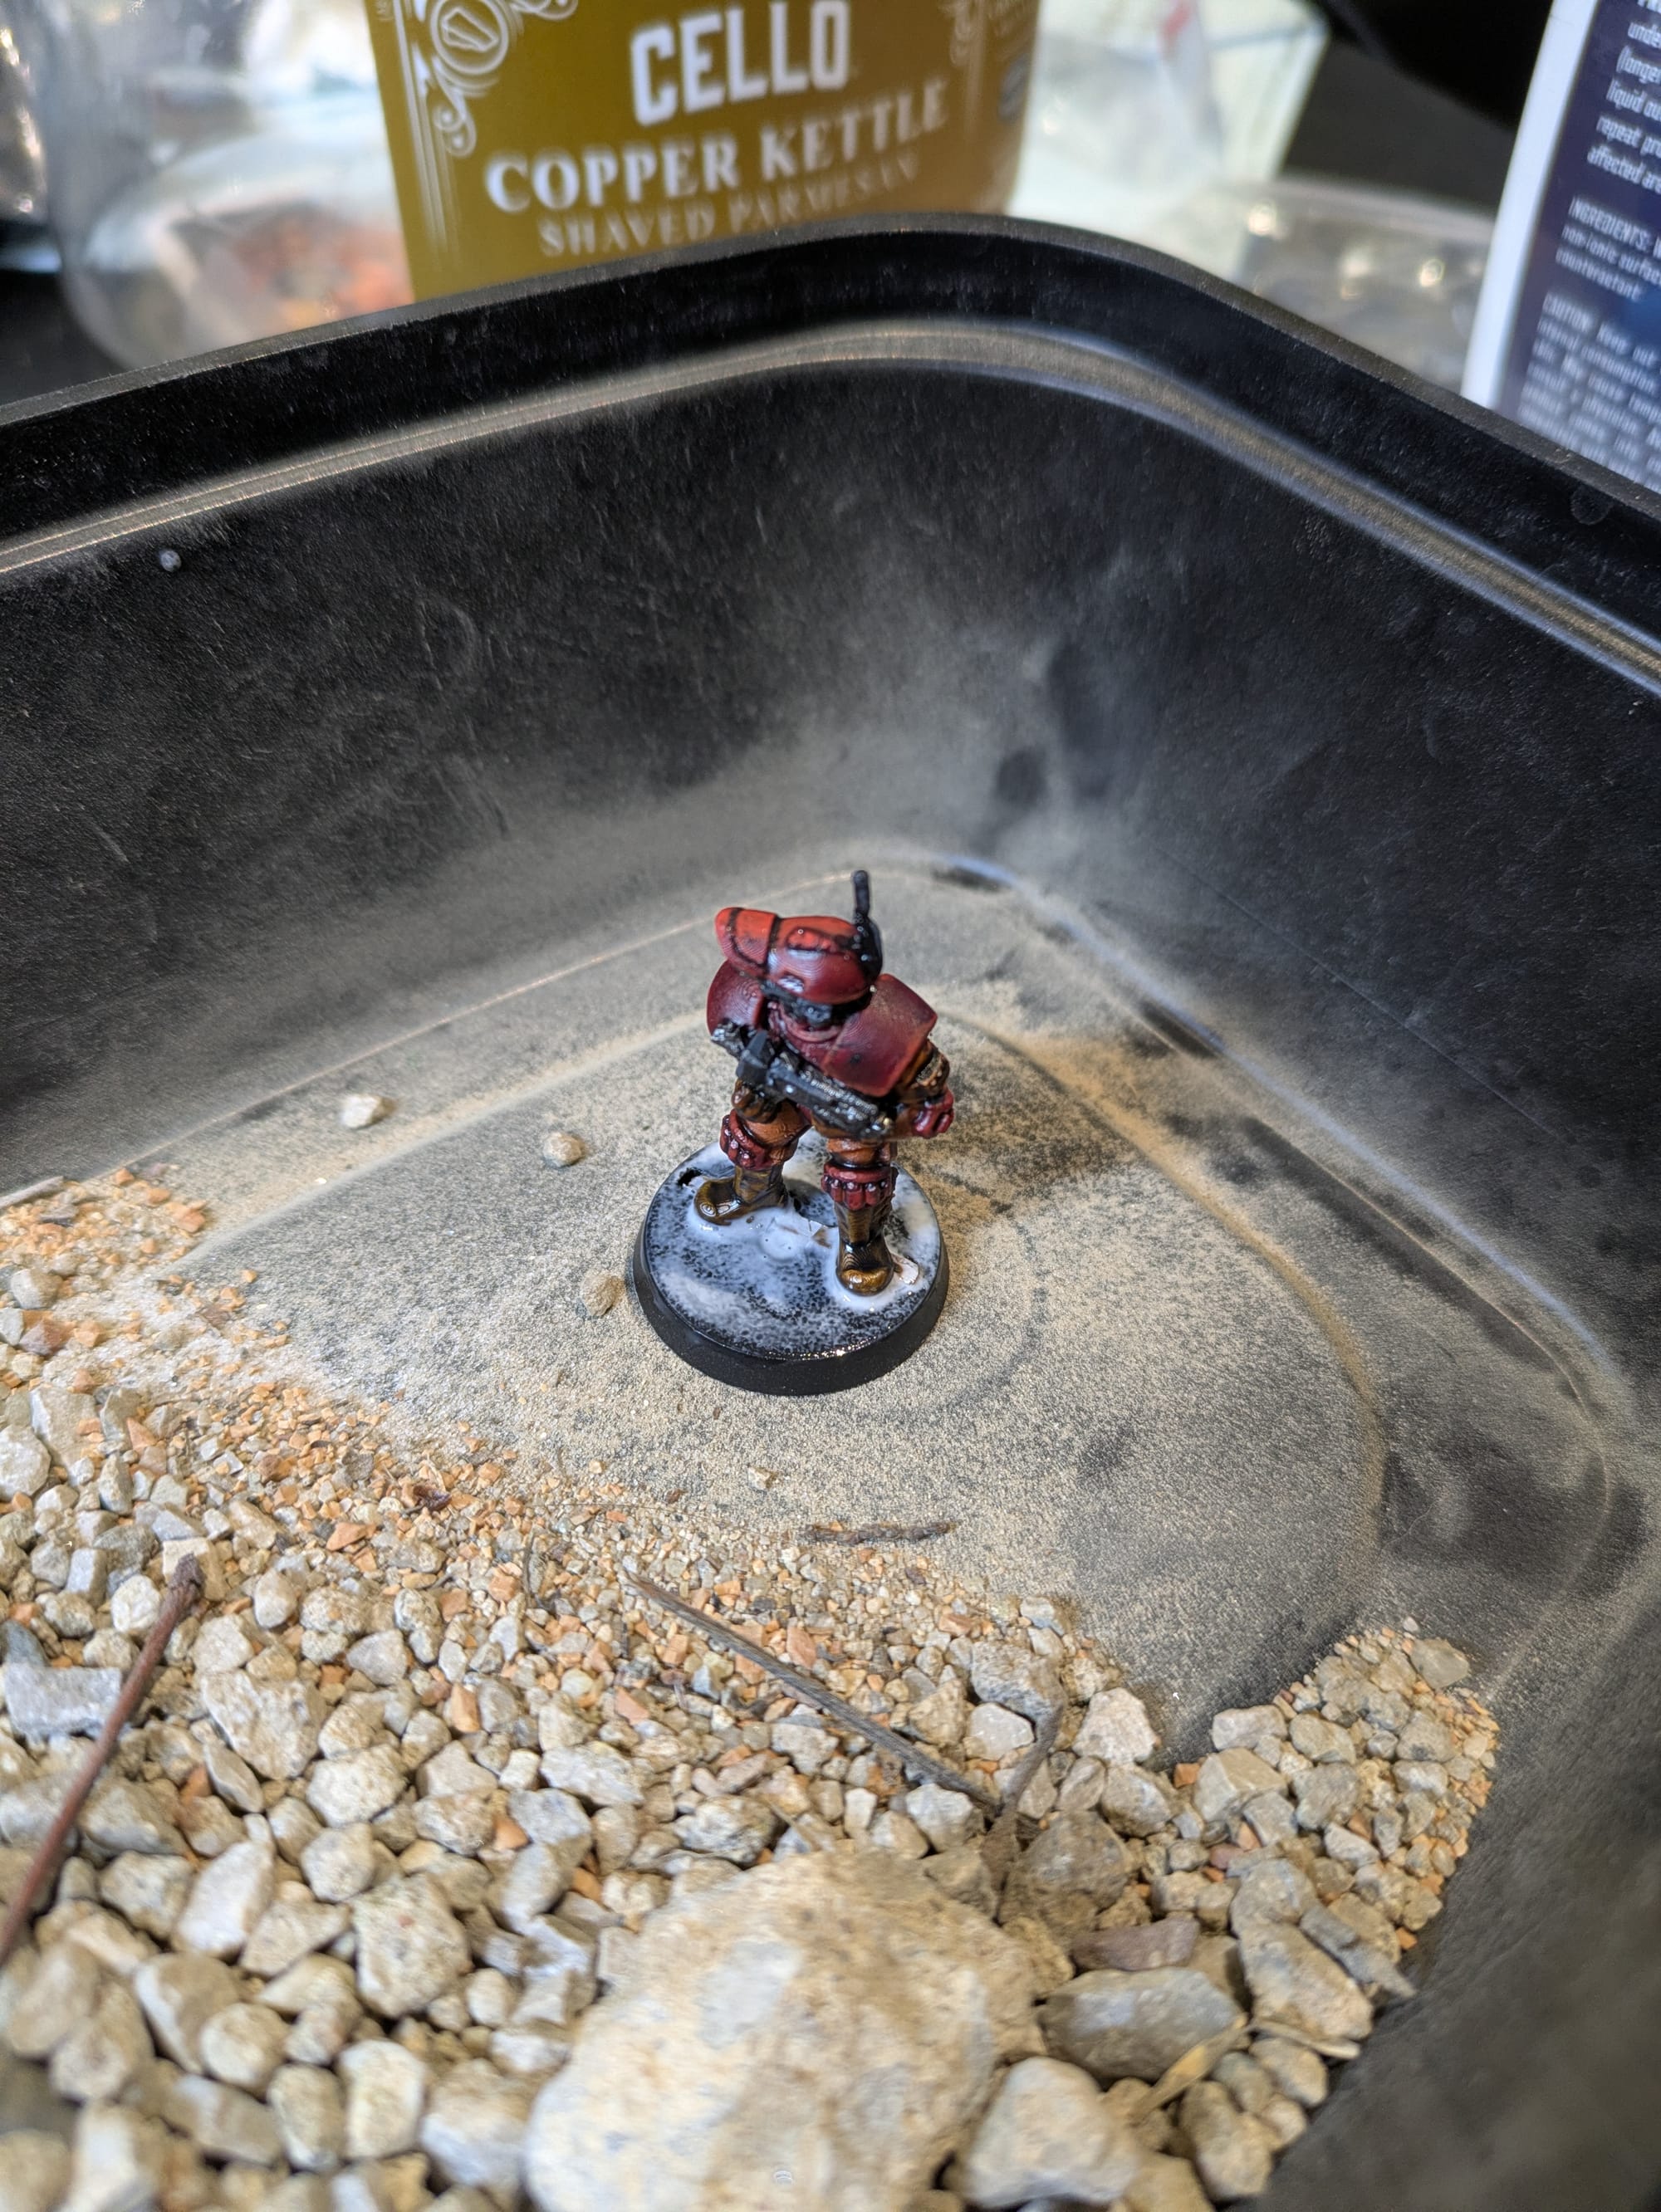
- Glued the model into a slotta base
- Added mixed sand
- Painted the base Zandri Dust style
- Brown wash
- Drybrushed Ushabti Bone
- Picked out the rocks in grey


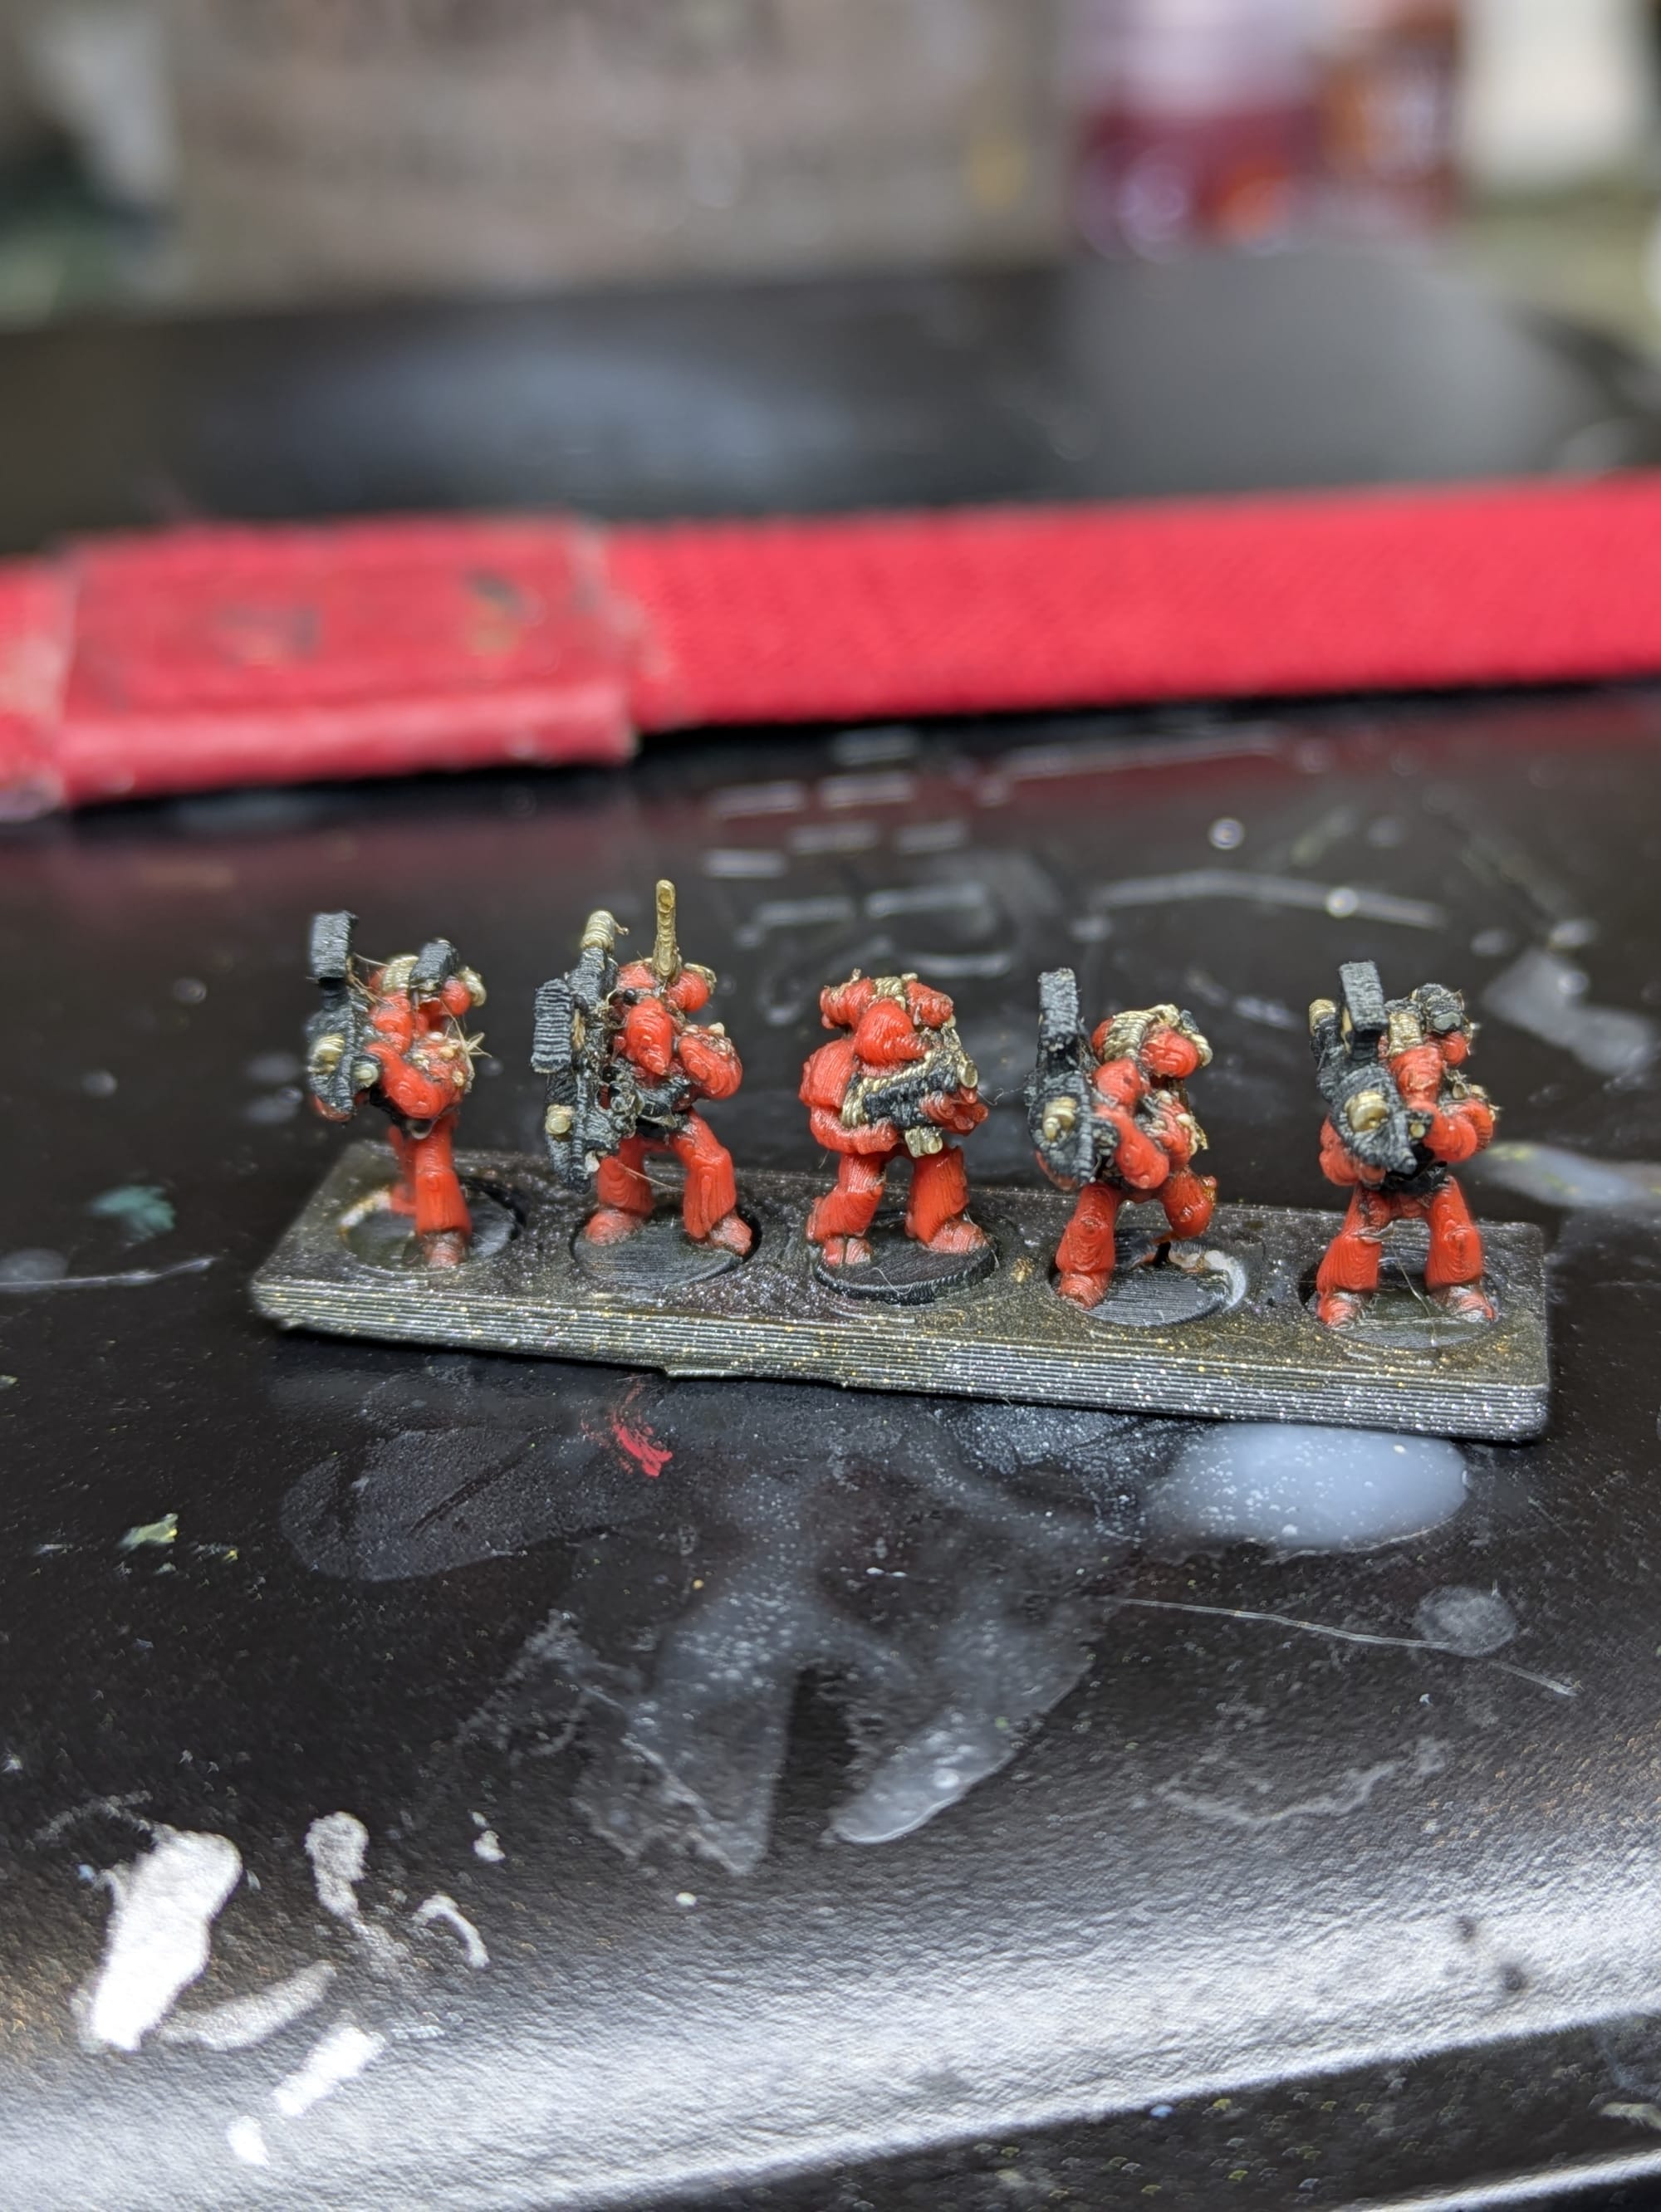
WIP pics.
Sharing the Profile
The main goal of today's project was to build and share a miniature profile for the Prusa XL that others could download and use. I wanted something that is stable and predictable and that improves on the default settings without fighting the machine.
Here is the profile I used for this print, again if you want it:
Final Thoughts
The XL is finally producing the kind of miniature prints I hoped for. Fixing the mechanical problems and rebuilding the settings took a while, but the end result was worth it. This profile will be my starting point for future prints and I am much more confident in the machine now.
Again, if you found this an interesting read and you'd like to hear future updates, you can subscribe for free to get newsletter updates from the blog!
Now, if you like reading mundane accounts of troubleshooting, here's some bonus content of me resurrecting my printer before the project began:
Epilogue - My Prusa XL
My XL has been sitting in disrepair for about a month. While printing out a basic storage separator piece (a literal flat plane with embossed text), an unfortunate print failure occurred. This caused me to rage quit 3D printing for that whole period.
Coming back it, from what I can piece together, the main issue was the print and wipe tower detached from the bed. Toolhead 1 then grabbed onto this and started dragging it around, forming a very fun and cool blob of death. At some point, this resulted in an impact, knocking the toolhead out of alignment. This misalignment prevented the printer from docking afterwards - it just ran into the side of the rack and failed. Mind you, the printer can't do anything until the toolhead is docked.
No matter how good your printer is, or which brand, FDM prints will fail at a non-zero rate. When this happens, you have to expend energy (maybe a little, maybe a lot) to troubleshoot and move on. One of the hardest things about motivating myself to do this is the unknown of how long and how many troubleshooting steps await me. I'm someone who likes 3D printing for the artistic, not tinkering, aspect.
Fortunately, the solution turned out to be really quick and easy! Once I finally mustered the energy, I cleaned up the failed print, cleared the stray filament off the nozzle, and ran the Tool Dock Calibration. That was all that was needed to bring the toolhead and printer back to life.
In the case of my XL, bed adhesion was the main failure mode I've seen throughout the year (as was the case here.) I haven't been in the habit of washing my build plate, and I resolve to do that going forward. Hopefully I don't need to start regularly applying double sided tape or glue stick, but we'll see.
Once the machine was docked correctly, I swapped in a .25mm nozzle to toolhead 2. That's where the next problem arose...
Fixing the Load Cell
With the 0.25 nozzle installed, I now started getting repeated "Filament Stuck" errors when prints would start. This would happen over and over again, not allowing the print to progress.
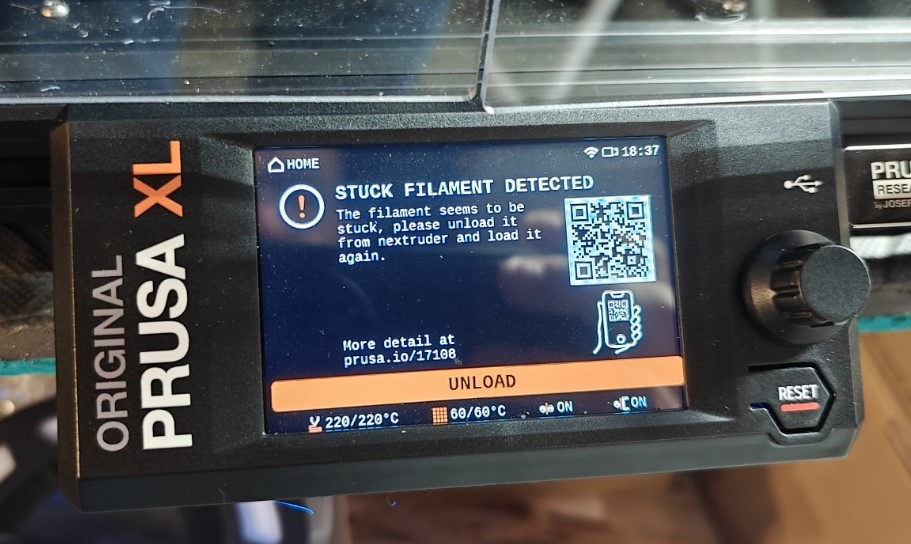
I confirmed the filament could load, unload and purge just fine. The filament was not really stuck, so something else must be the problem. After asking ChatGPT (ChatGPT is a wonderful printer debugger), and doing a bit of Googling, I learned I need to re-run load cell calibration after switching to a .25mm nozzle. I ran this and was then blocked by load cell calibration errors. Running over and over again saw the same behavior - the load cell was very noisy at a baseline level, which caused the calibration error.
The fix turned out to be simple again. I reseated the Nextruder's ribbon cable (that's a fancy way of saying I unplugged it and plugged it in again) and pulled the nozzle out ever so slightly before re-securing it. After that, calibration succeeded after a few more repeated tries. My next print gave me one last filament stuck warning but it continued past it and printed without issue.
With the hardware (more?) stable (maybe?), I could finally focus on the slicer profile. Since then, I've learned I can disable stuck filament detection. I unfortunately decided it's for the best for me to do this, since I don't want to invest any more time on this problem. Maybe when the next firmware update comes around, I'll try re-enabling it and re-calibrating to see if anything changes...